Homeschool (Co-op) Lesson: The Heart and Circulatory System
Temporarily editing to add: This post has recently gained some traction, so I would love to point anyone interested in the direction of my other homeschool co-op posts, one on the Babylonian Empire and another on the Ancient Olmec Civilization. And I’m working on a couple more (Antarctica and the Sahara Desert) right now. Additionally, all of my posts, both short form and long form, related to homeschool can be found here.
We (my 4, almost 5, year old and I…and sometimes my 2 year old) are part of a small homeschool co-op consisting of 7 kiddos (and some younger siblings) who are all currently 4 and 5 years old. We meet once a week and the moms take turns putting a themed lesson together. We’ve been doing this for three years now and have, obviously, tailored what we choose to teach based on the kids’ ages.
This year, we decided to group our themes together a little better. So, our first several lessons were loosely based around water (water cycle, storms, rainforest, ocean). And our second set of lessons were about the human body. For this set, I chose the heart and circulatory system as my theme. I was excited about doing it. But when I sat down to gather resources, it wasn’t quite as easy as I thought it might be. The kids always, always absorb more than we give them credit for, but I knew I still needed to carefully choose how much and what information to present to them. That was the most difficult part… Finding age-appropriate activities to match the content I wanted to give to them.
Pinterest is my best friend when it comes to planning these types of lessons. But I was coming up a little short on ideas for our age group. It took a little deeper digging than other unit studies. That’s part of why I decided to put all the information into this post. Maybe it’ll be helpful to someone and search time will be decreased. I do want to mention that it ended up being fun, and the kids seemed to enjoy it. So, if you’re on the fence about teaching a subject that may seem a little more complicated than others for 4 and 5 year olds, just go for it! I kind of accidentally did since I made a previous commitment to do so. But I’m glad I did! I also feel quite certain all of the activities and books we used could be tailored to older ages very easily. So if you’ve gotten this far and think what’s below may be too elementary, please dive a little deeper and have some fun figuring out how these ideas can work for you and your crew.
I tend to get wordy when I write, so I’m stopping all the intro now and giving you what you probably came here for anyway.
I split the lesson into 4 sections. So, I’m going to do that here as well.
- THE HUMAN HEART: WHAT IS IT? WHERE IS IT? WHAT DOES IT LOOK LIKE?
- LET’S LEARN A LITTLE ABOUT OUR BLOOD
- WHAT IS YOUR PULSE?
- THE CIRCULATORY SYSTEM
THE HUMAN HEART: WHAT IS IT? WHERE IS IT? WHAT DOES IT LOOK LIKE?
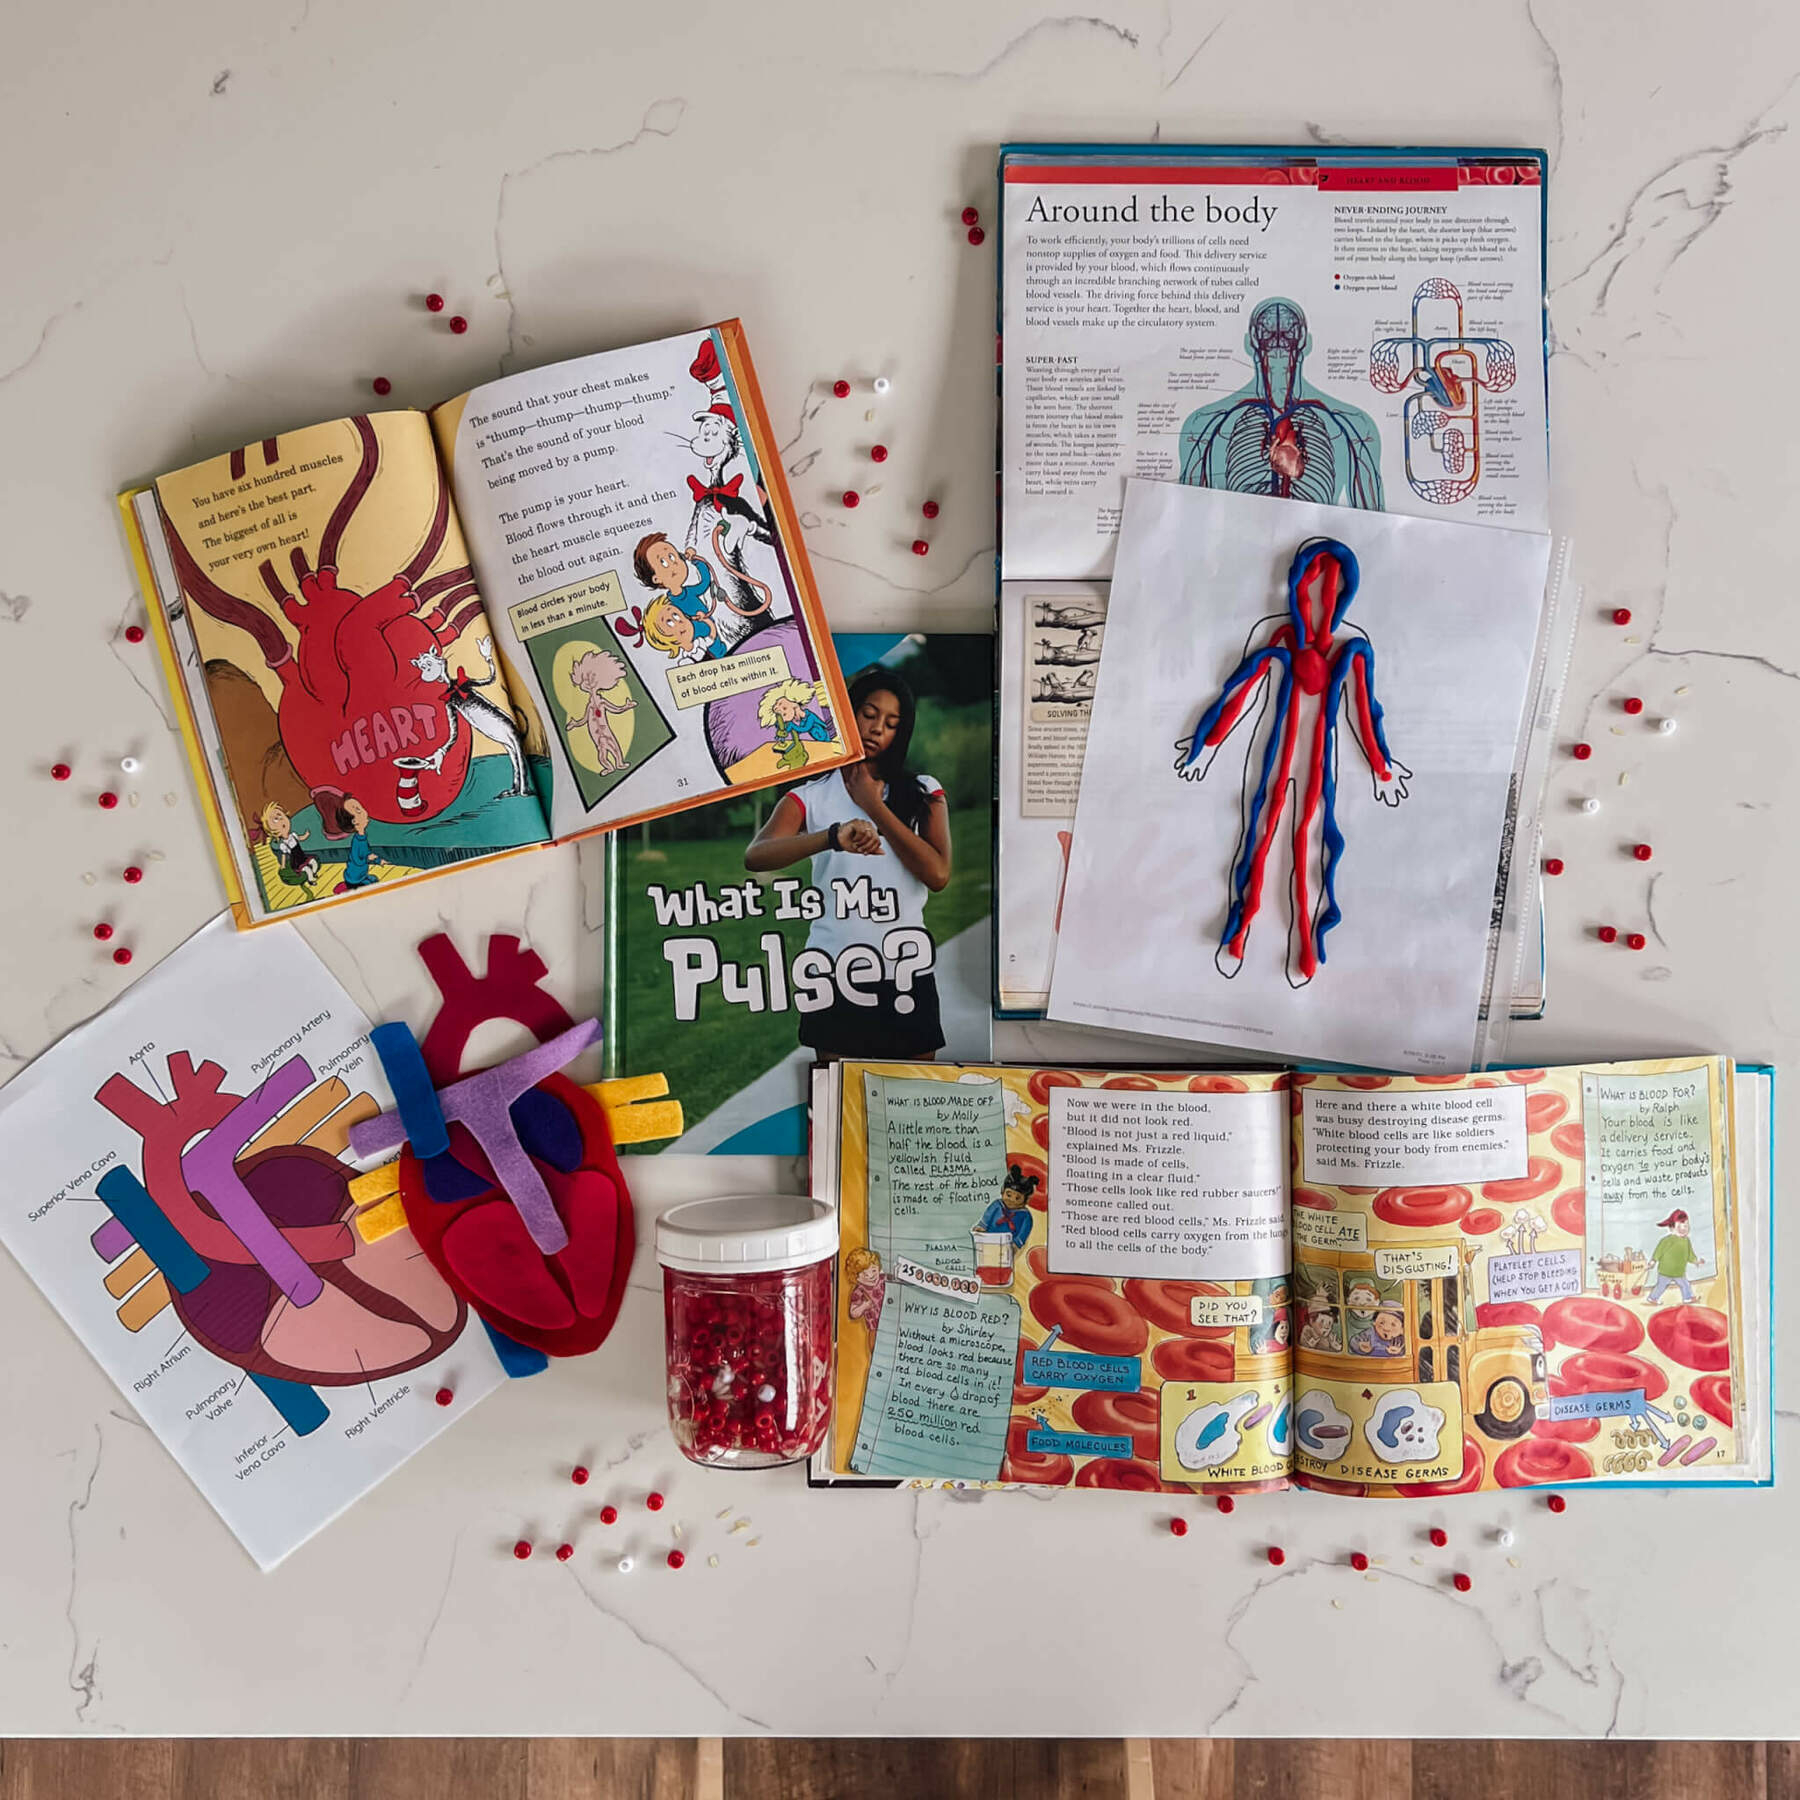
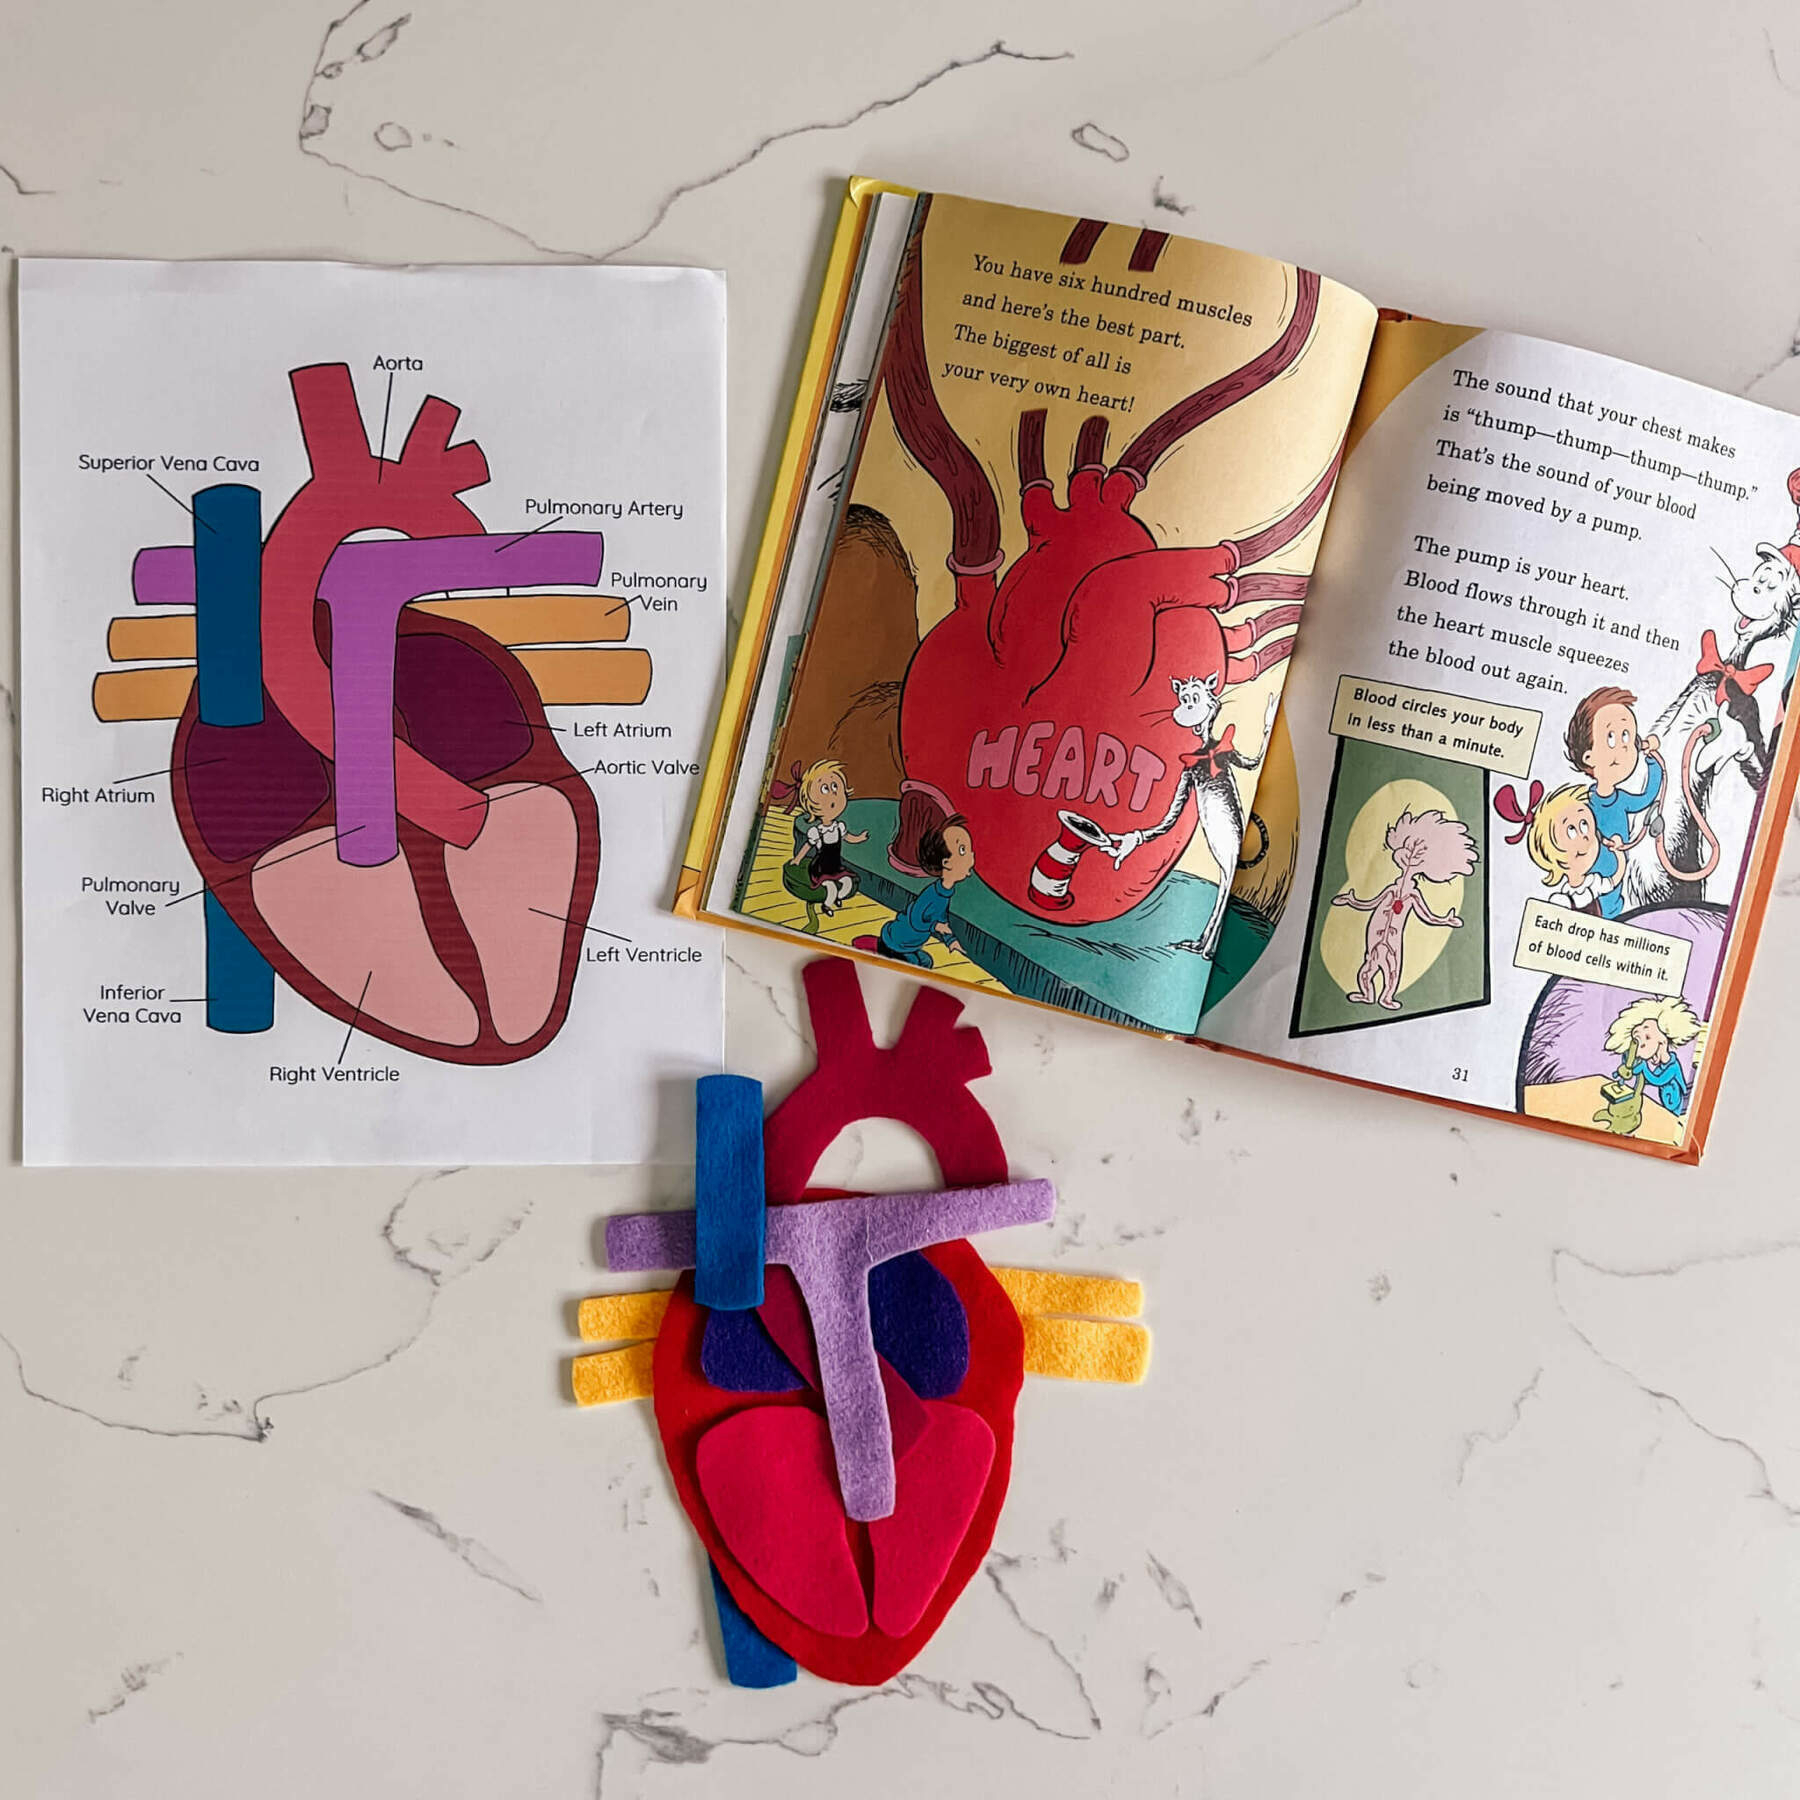
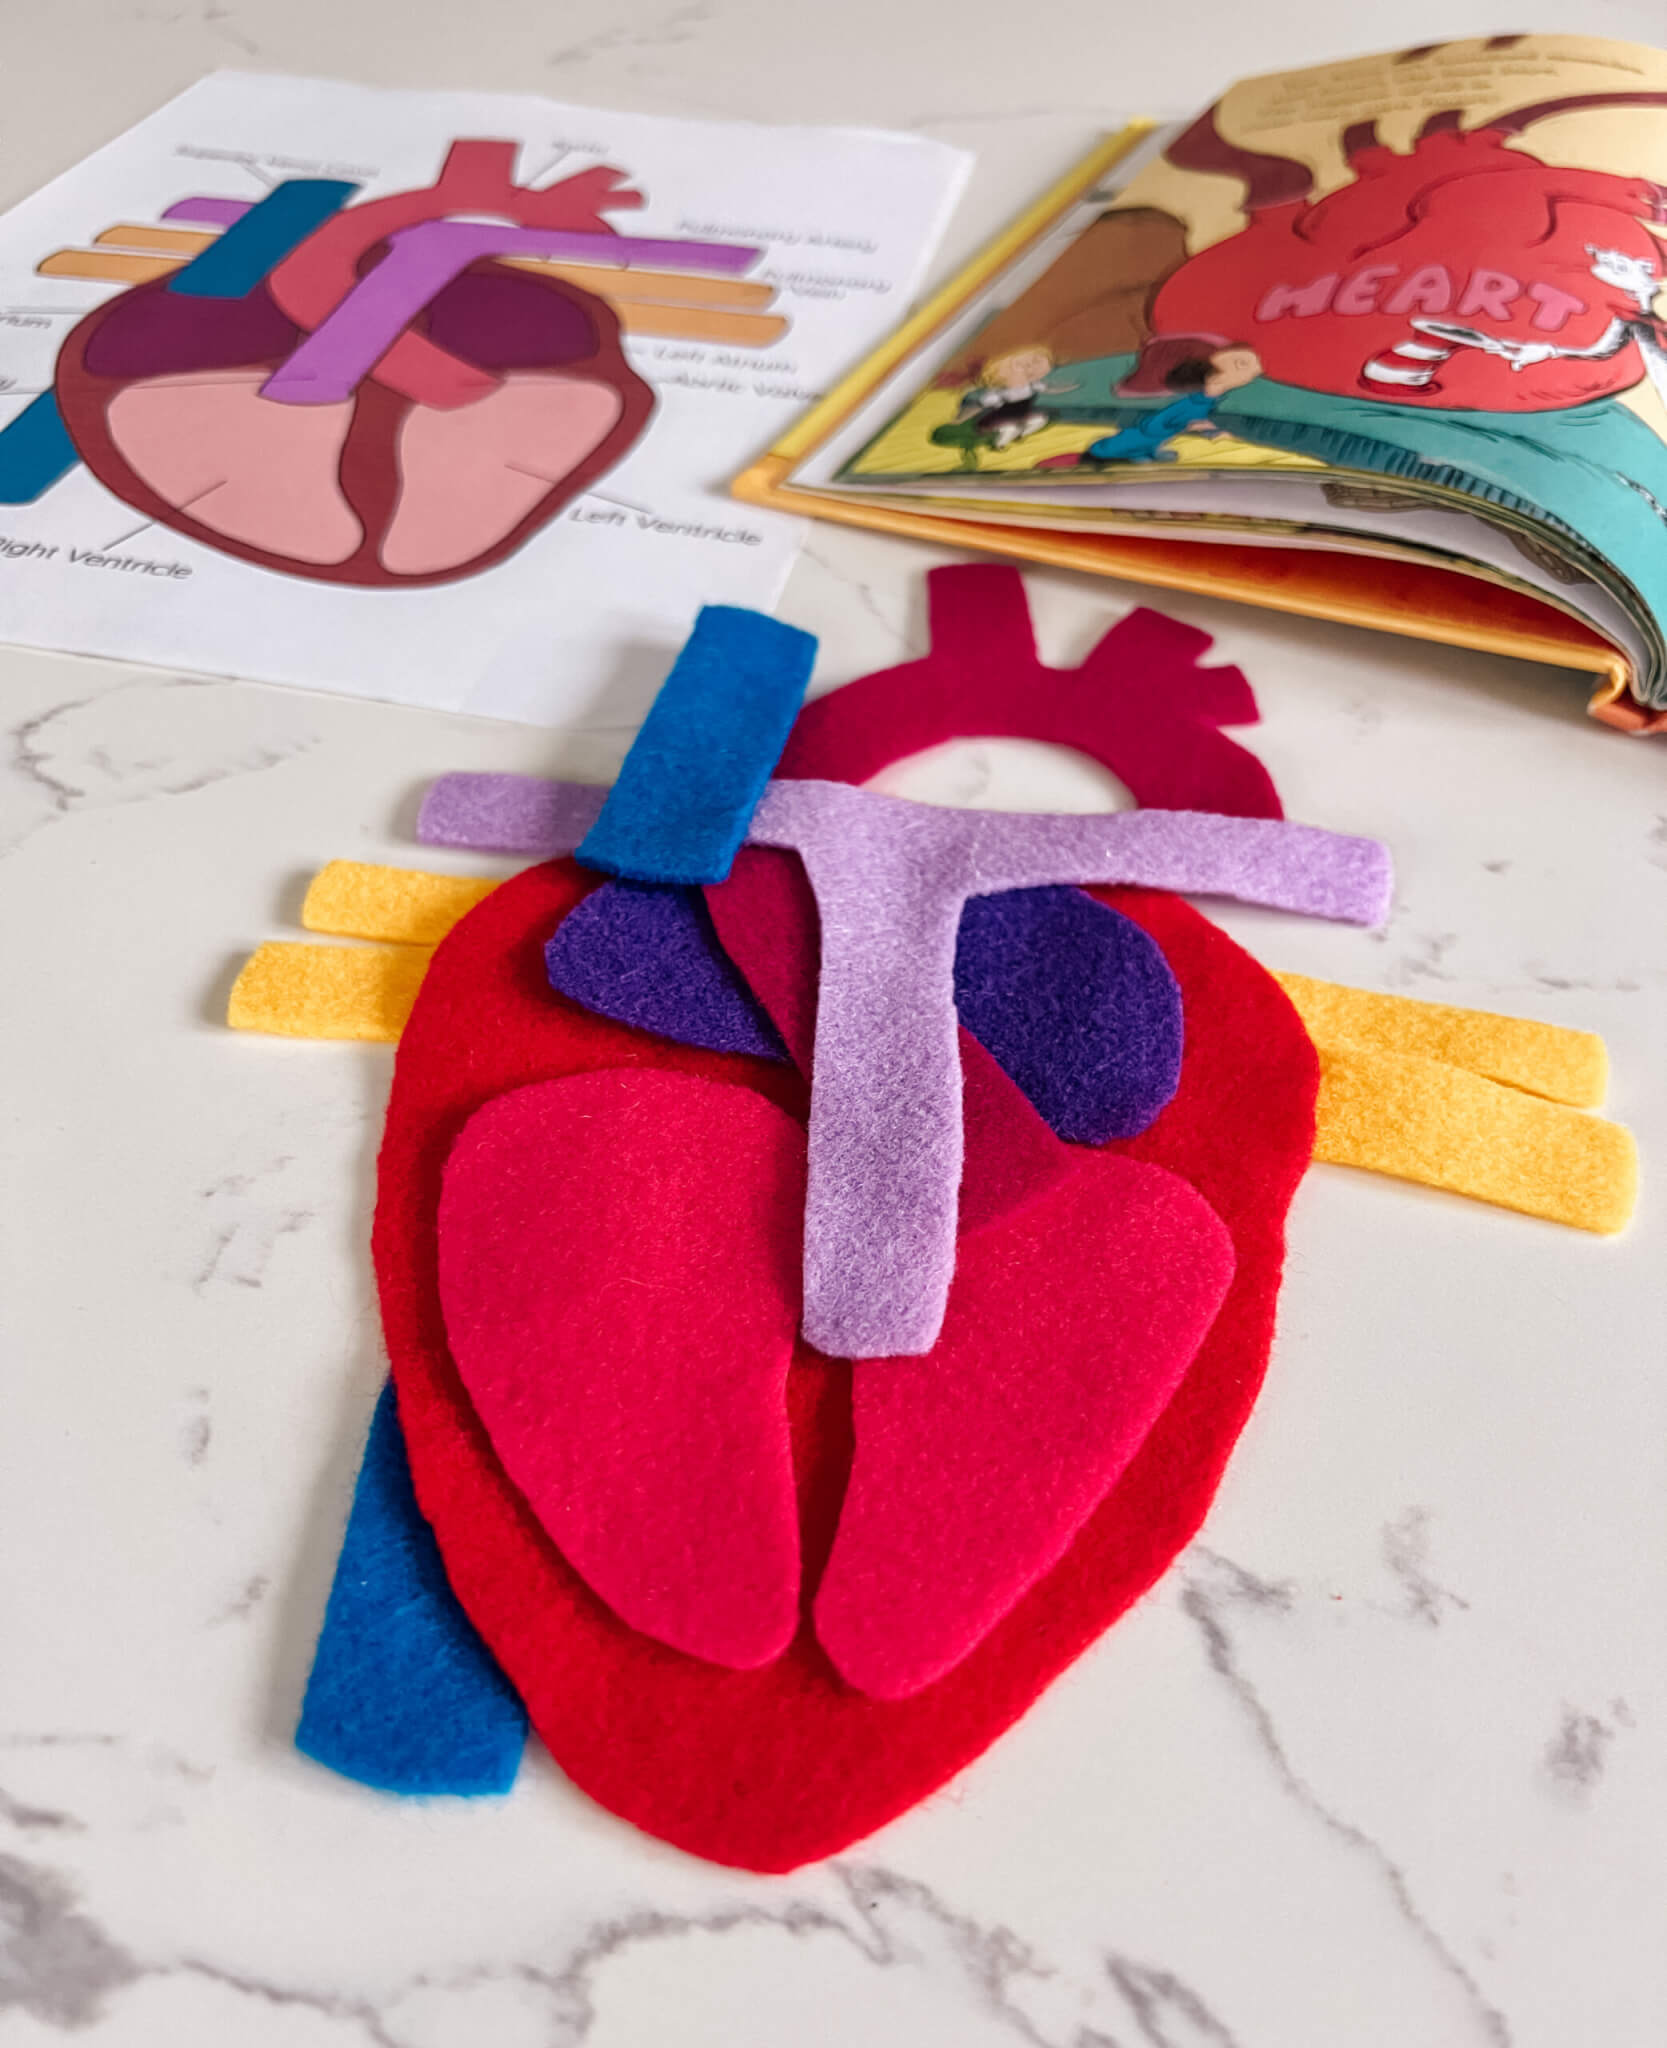
I introduced the lesson by asking the kids about their muscles. As expected, they all were very excited to show me their strong muscles. That easily led us into the conversation of our hearts being our strongest muscle. We talked a little about all the work it does. And how it’s a pump that moves blood throughout our whole body. Then, we discussed where it is in our bodies and moved on to what it looks like. I had them all make a fist to get a rough idea of the size of our hearts. After that, I gave everyone a felt “puzzle” piece so that we could put together an example of what our hearts look like. I used the cut out pieces and anatomy of the heart illustration from Stephanie Hathaway Designs Heart Mini Unit Study. Side note: I’ve been hoarding Stephanie Hathaway’s resources for a while every time they go on sale. I foresee us getting a good bit of use out of them in the future, but they’re even valuable to us now. Like with the heart felt puzzle. I considered discussing the parts of the heart, but with the big names and such, I decided it best to just put together a visual representation. It went well. Since each piece (or pair of pieces) was a different color, I gave each child one color. Then I asked for a specific shape and color to sort of slowly put together the puzzle. I do think they took in the visual and were surprised by what it looked like, which is really what I was going for there.Corresponding book: I wanted to have a book for each section of my lesson. I knew I may or may not get to it mostly because of the various attention spans of a group of seven children. For this section, I was going to use “Inside Your Outside: All About the Human Body” from The Cat in the Hat’s Learning Library. I just marked the section on the heart since that was what was applicable. I didn’t end up using it, though. But I did want to make note of it because it’s a good resource. If we ever go through this study again at home, there’s a good probability I would use it then since I would have more time.
LET’S LEARN A LITTLE ABOUT OUR BLOOD.
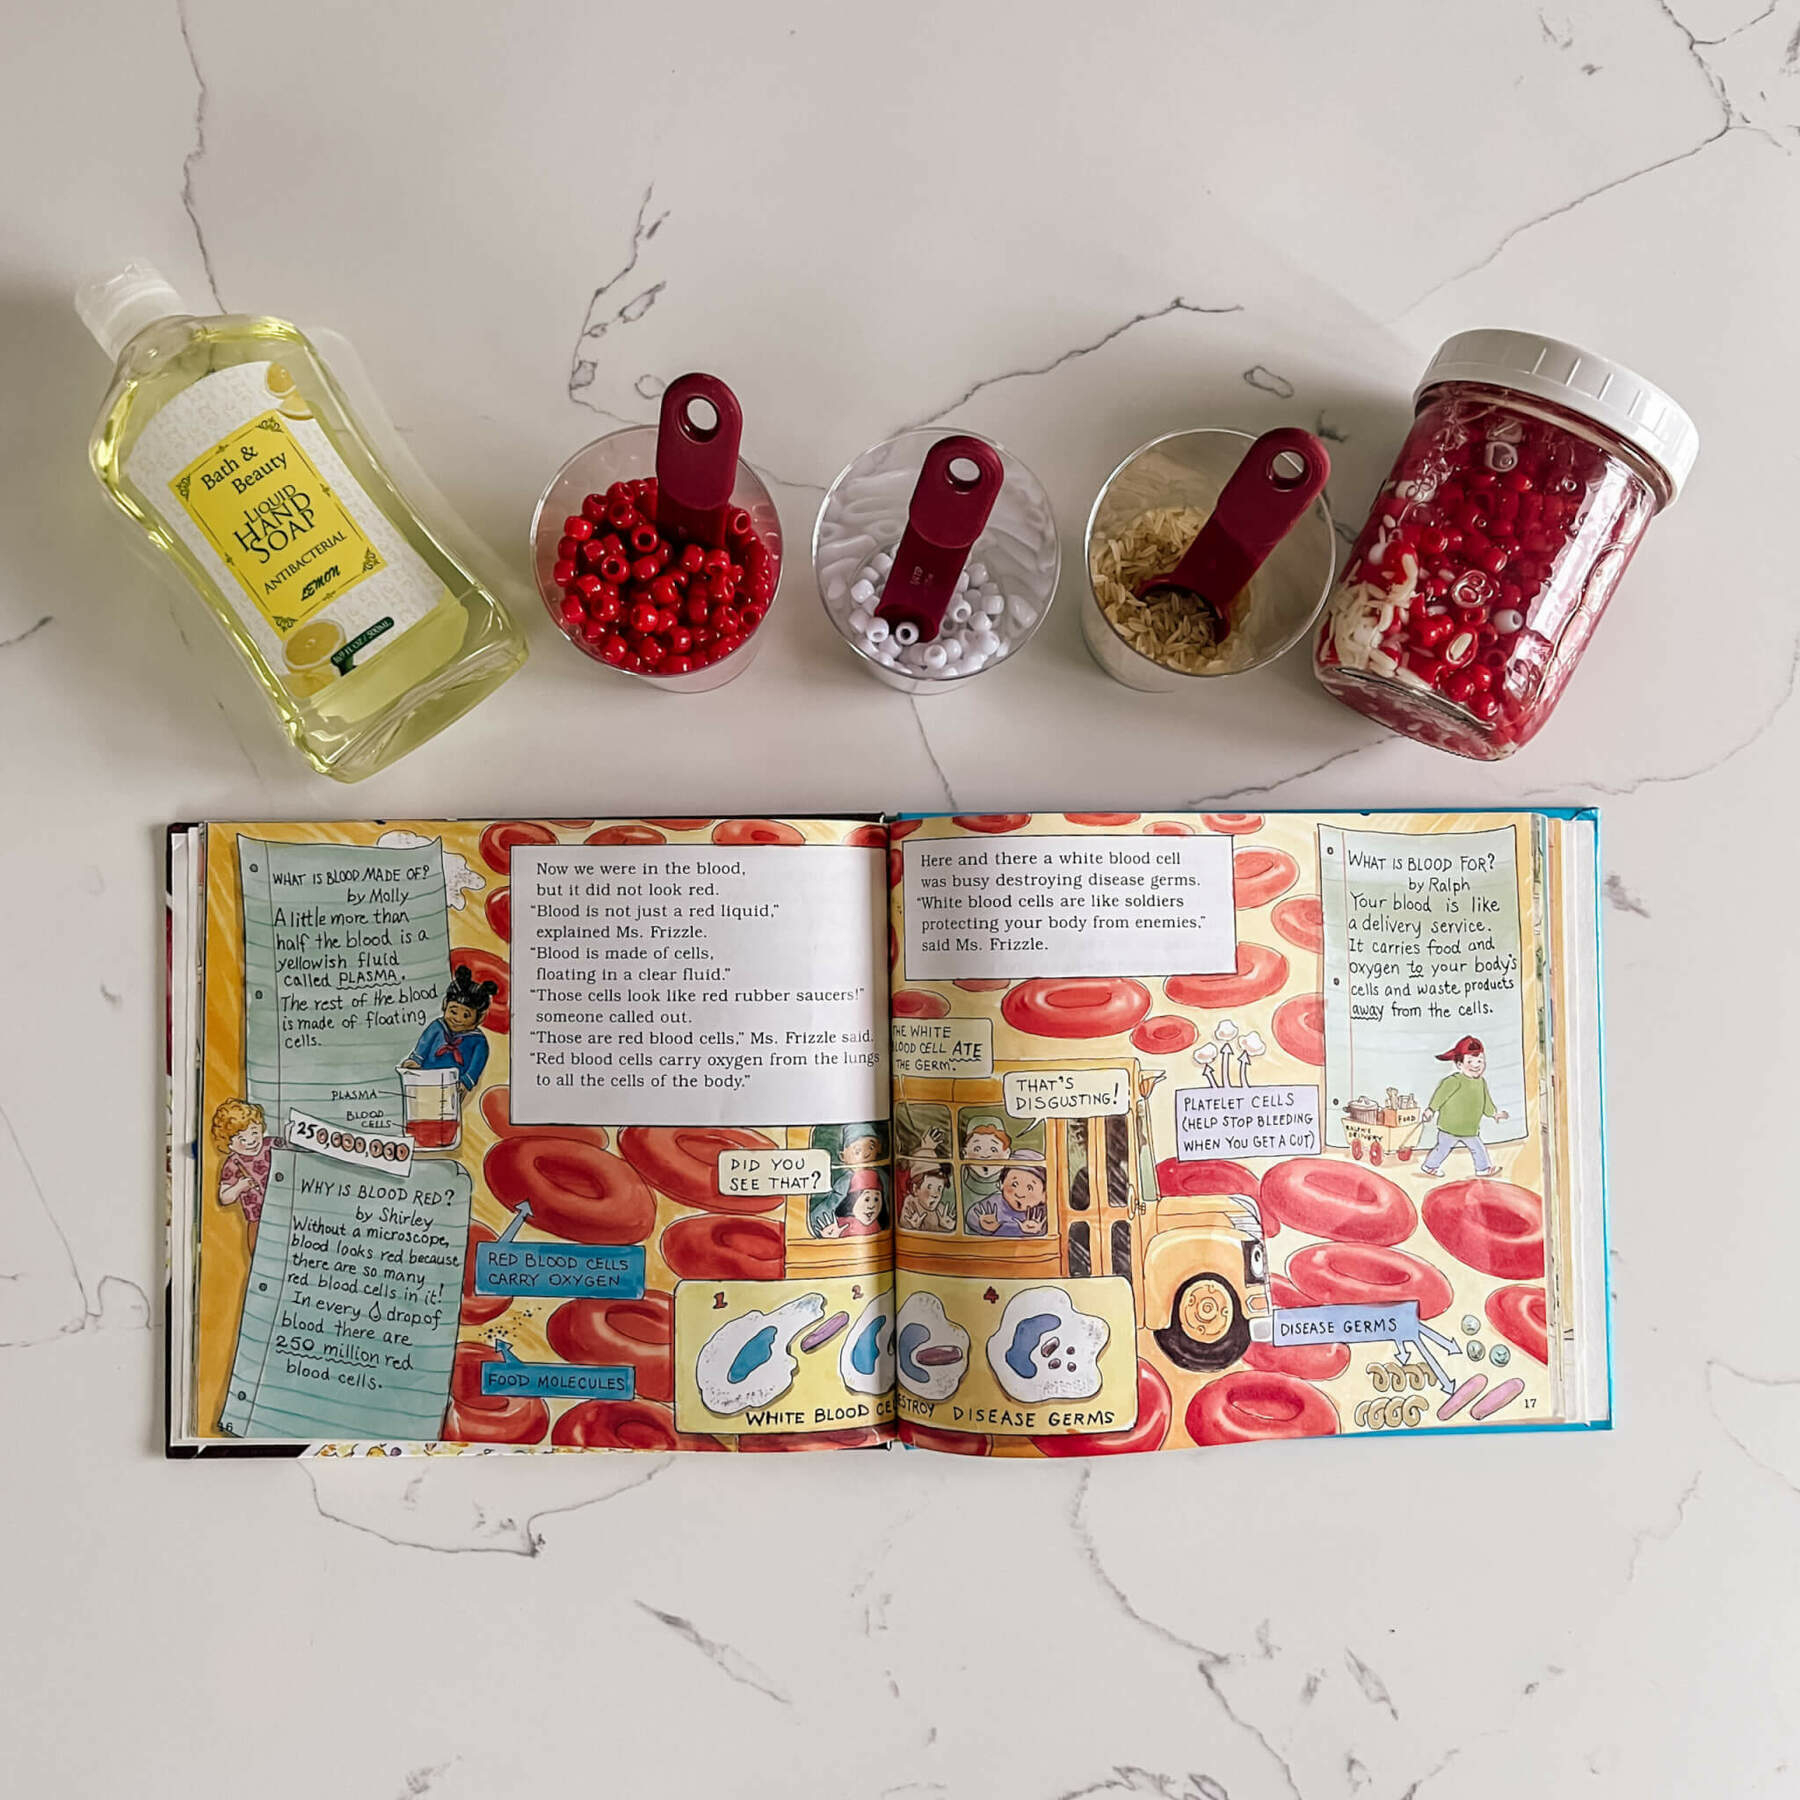
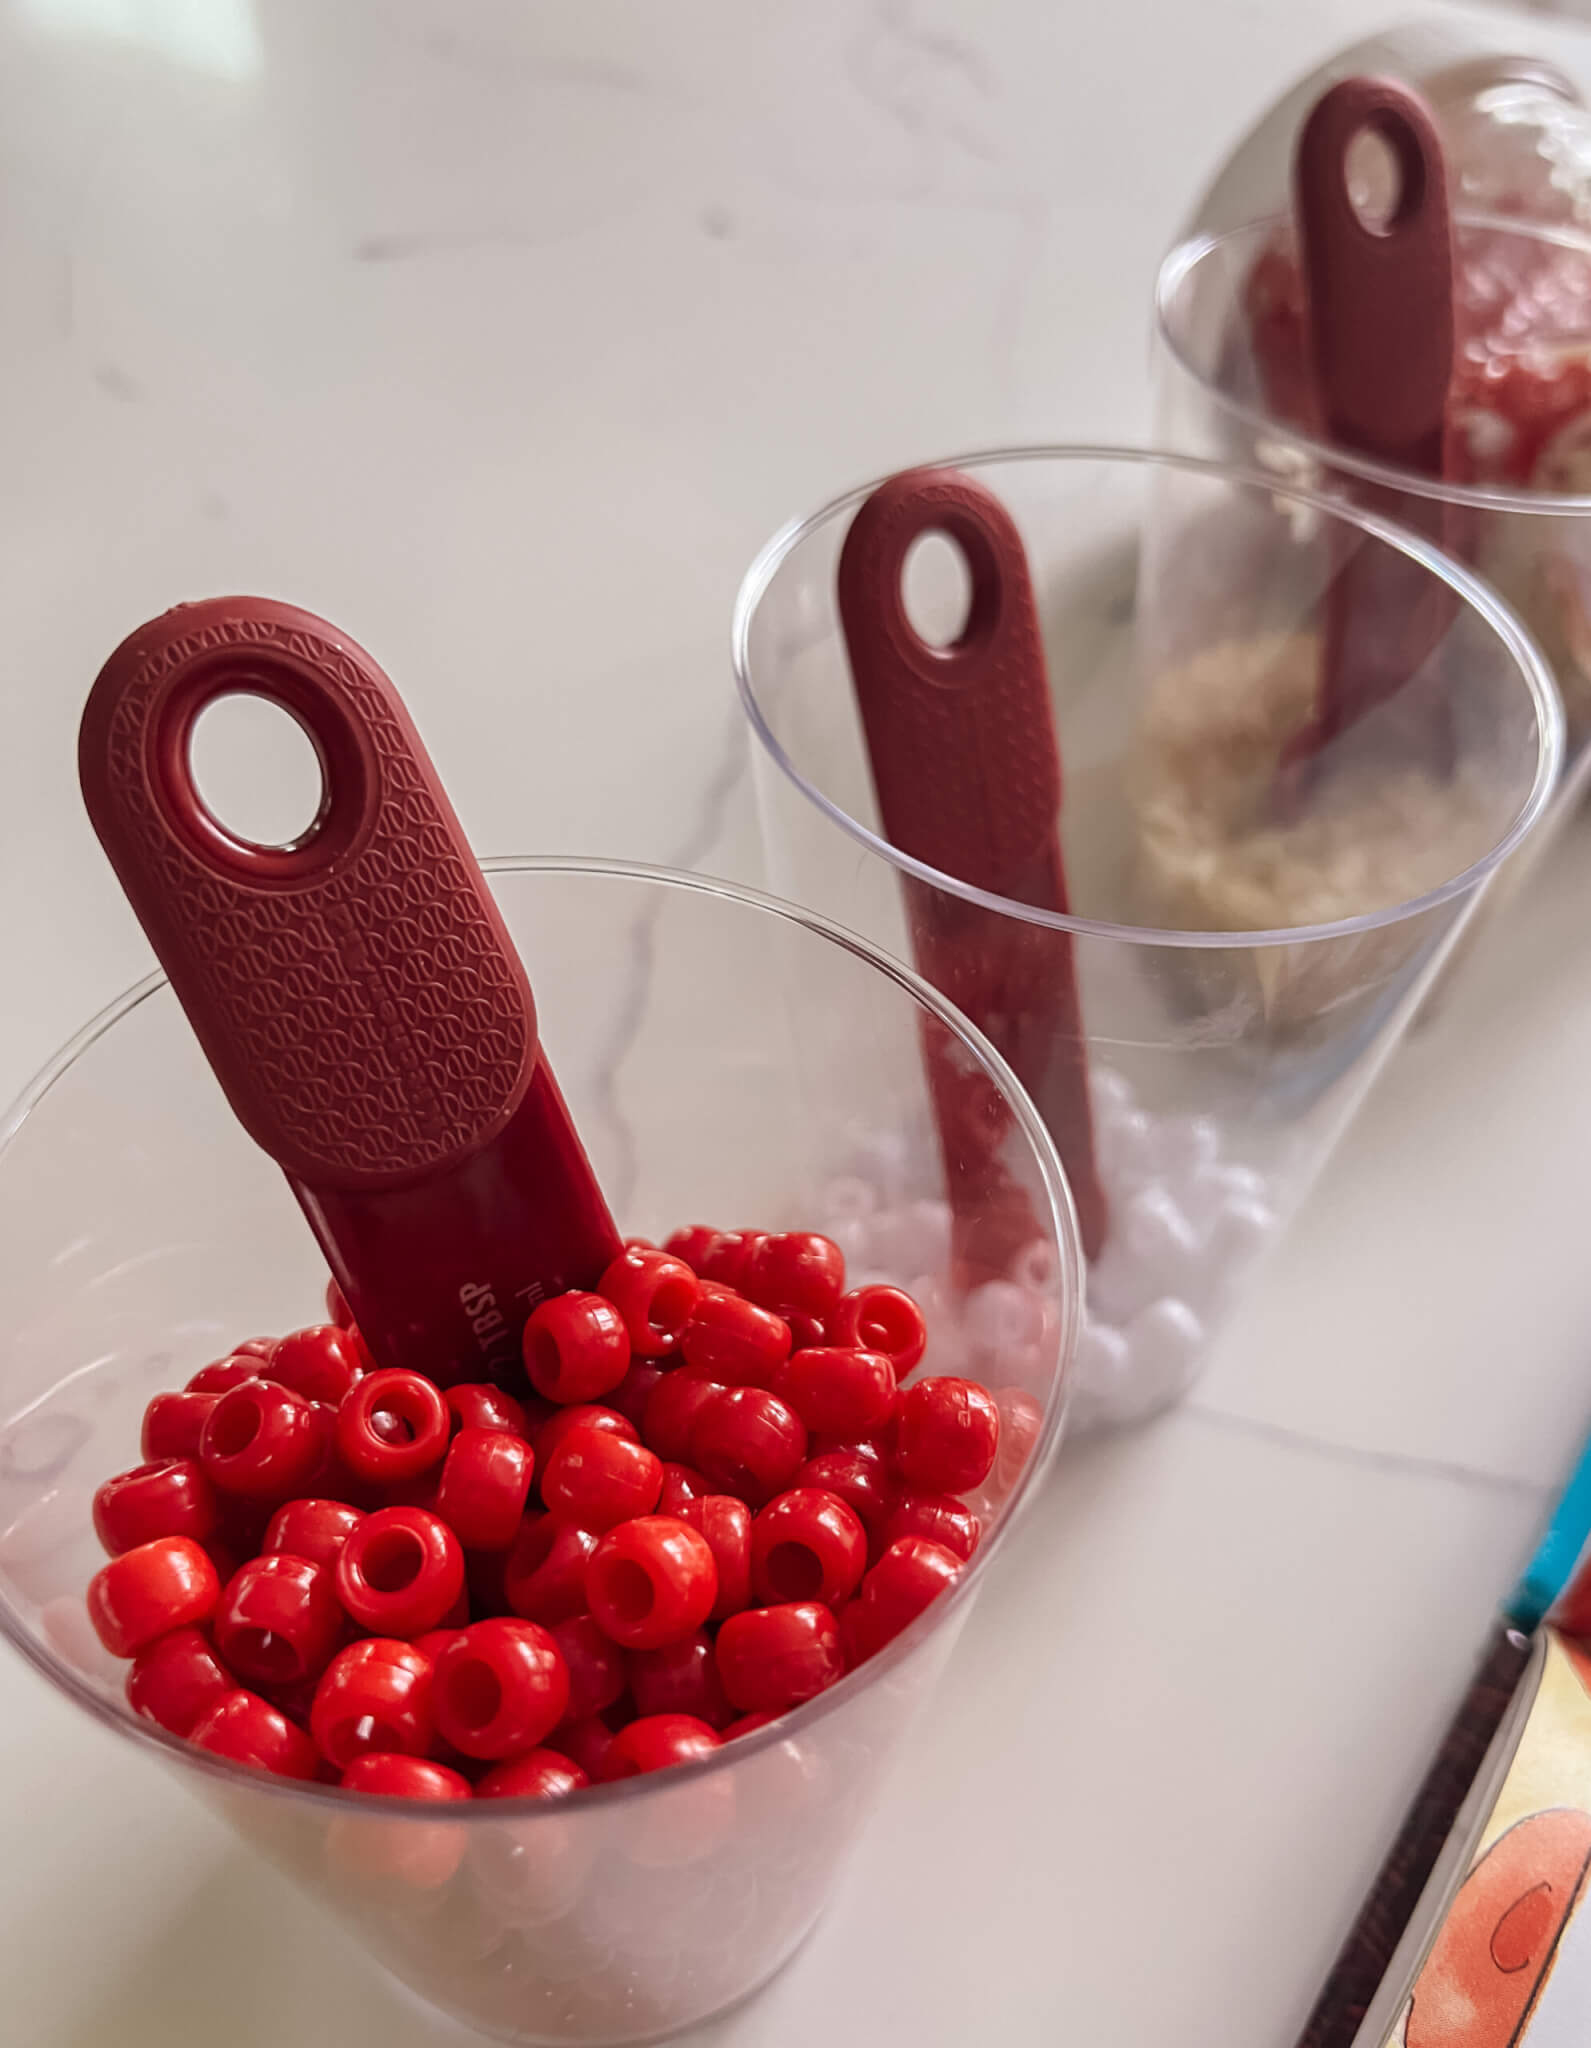
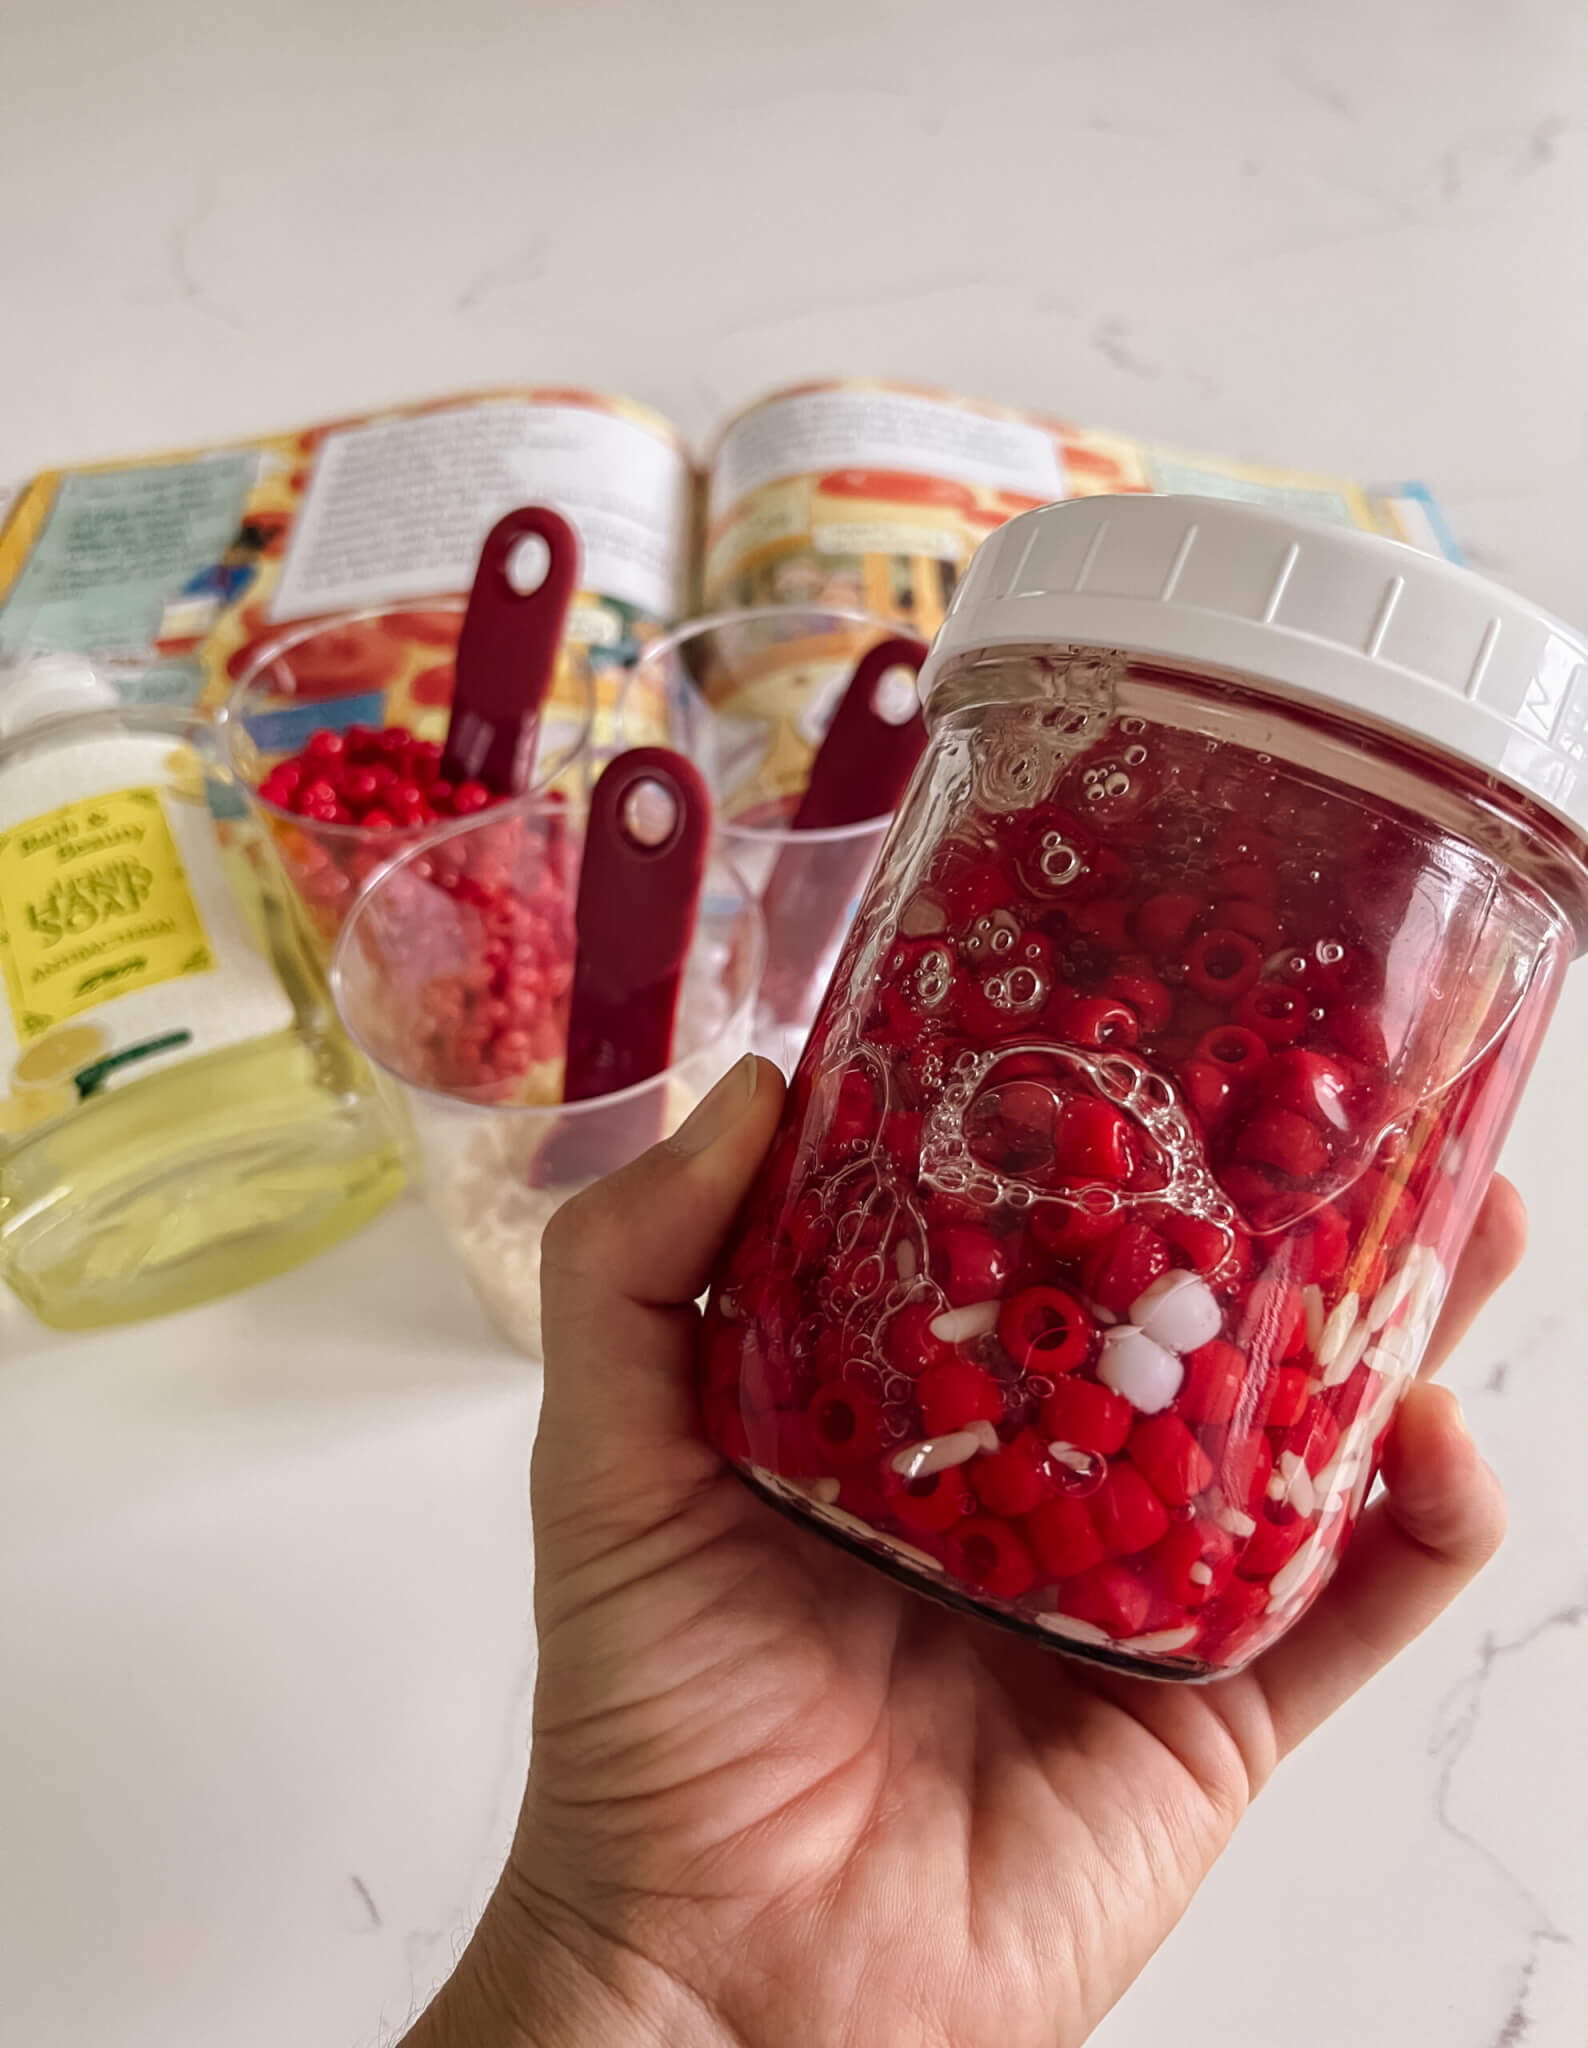
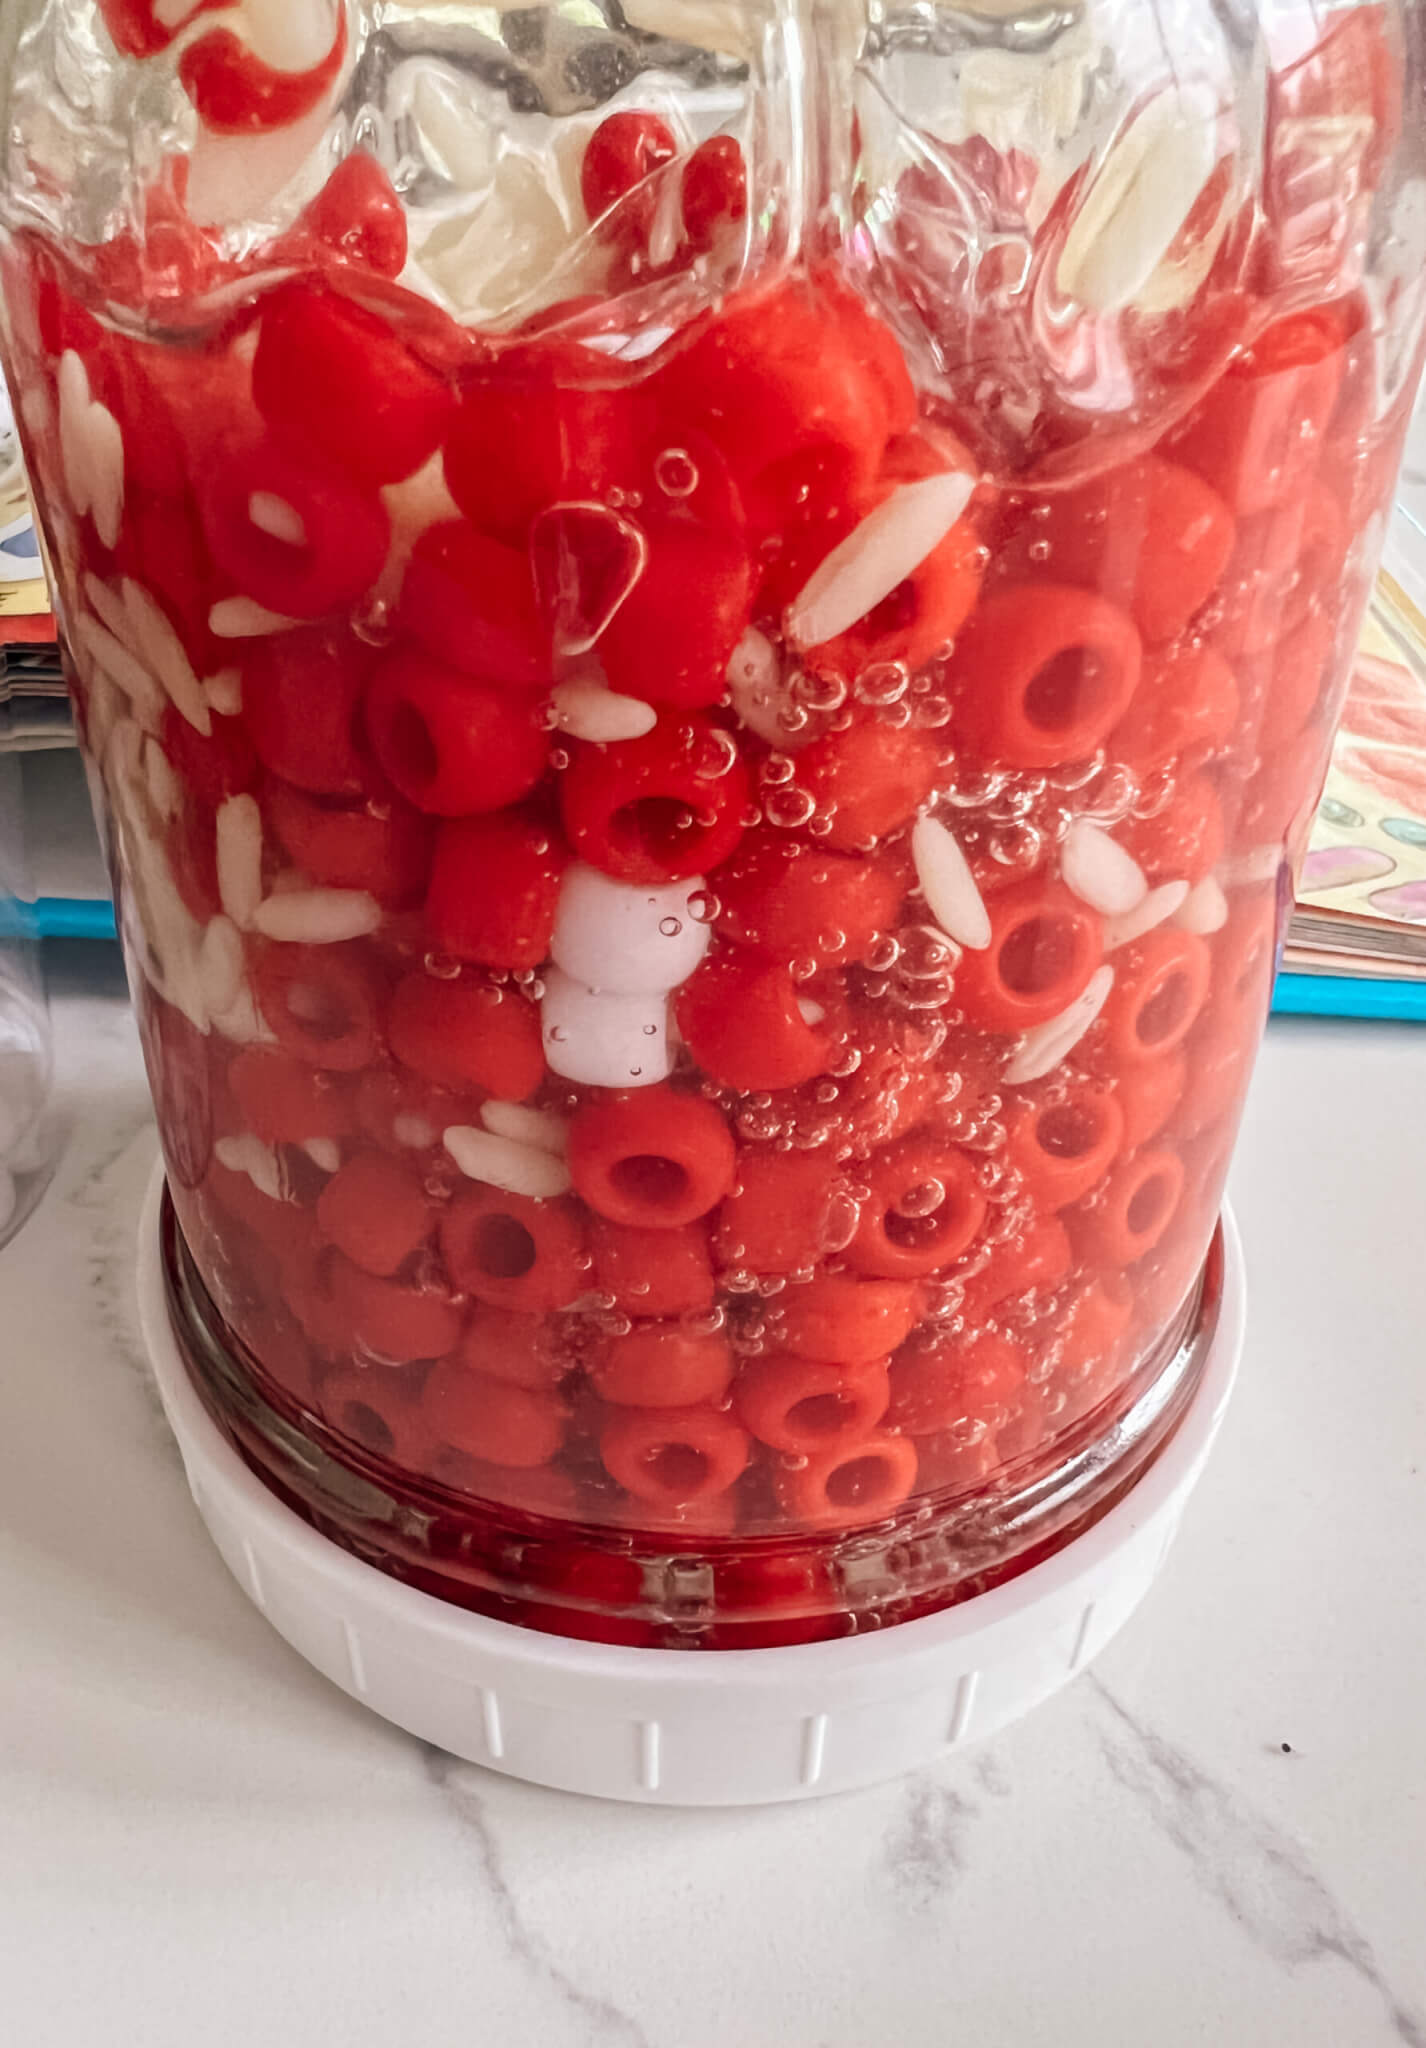
Since we mentioned that the heart’s primary job is to pump blood, I thought it would be fitting to have a section about blood. I started off this section by reading a portion from “The Magic School Bus: Inside the Human Body.” I liked the visual from that part of the book and the fact that it rather concisely covered the main components of blood and the purpose of our blood. After I read those two pages, our activity focused on what blood is made of. I based this activity off of the model in this blog post that I found via Pinterest. I didn’t have corn syrup, candies or sprinkles on hand, but I did have pony beads and rice. And I ran to Dollar Tree to pick up some yellow hand soap.I introduced each “component” of the blood by name and put it on the table in front of them. Then, I poured the “plasma” into a glass jar leaving enough room to add the other parts. We started with “platelets.” I had a small measuring spoon that each child used to scoop some rice into our model of blood jar. After that, we added “white blood cells.” We talked about how we don’t have near as many white blood cells and reiterated their important job of fighting off germs. The kids used another small (to ensure we didn’t get too many) measuring spoon to add white blood cells. Last, we added “red blood cells.” Even though my photos have the red blood cells in a clear cup like the others, I actually put them in a small bin with a big scoop so a lot got added at once (since we have so many RBCs). Alternatively, they could’ve just done several small scoops. After everyone had a turn adding the red pony beads, I closed the jar so we could let everything float around and observe the model of blood that we just made. I actually had to open the jar up and mix everything together real good because the soap was just a little too thick at first (it did become more liquid-y later). Anyway, after I did that, we had a short discussion on the color of blood and why it looks red even though it’s not made up of only red parts. It was a fun little project to do together and ended up being a good, simple visual.
WHAT IS YOUR PULSE?
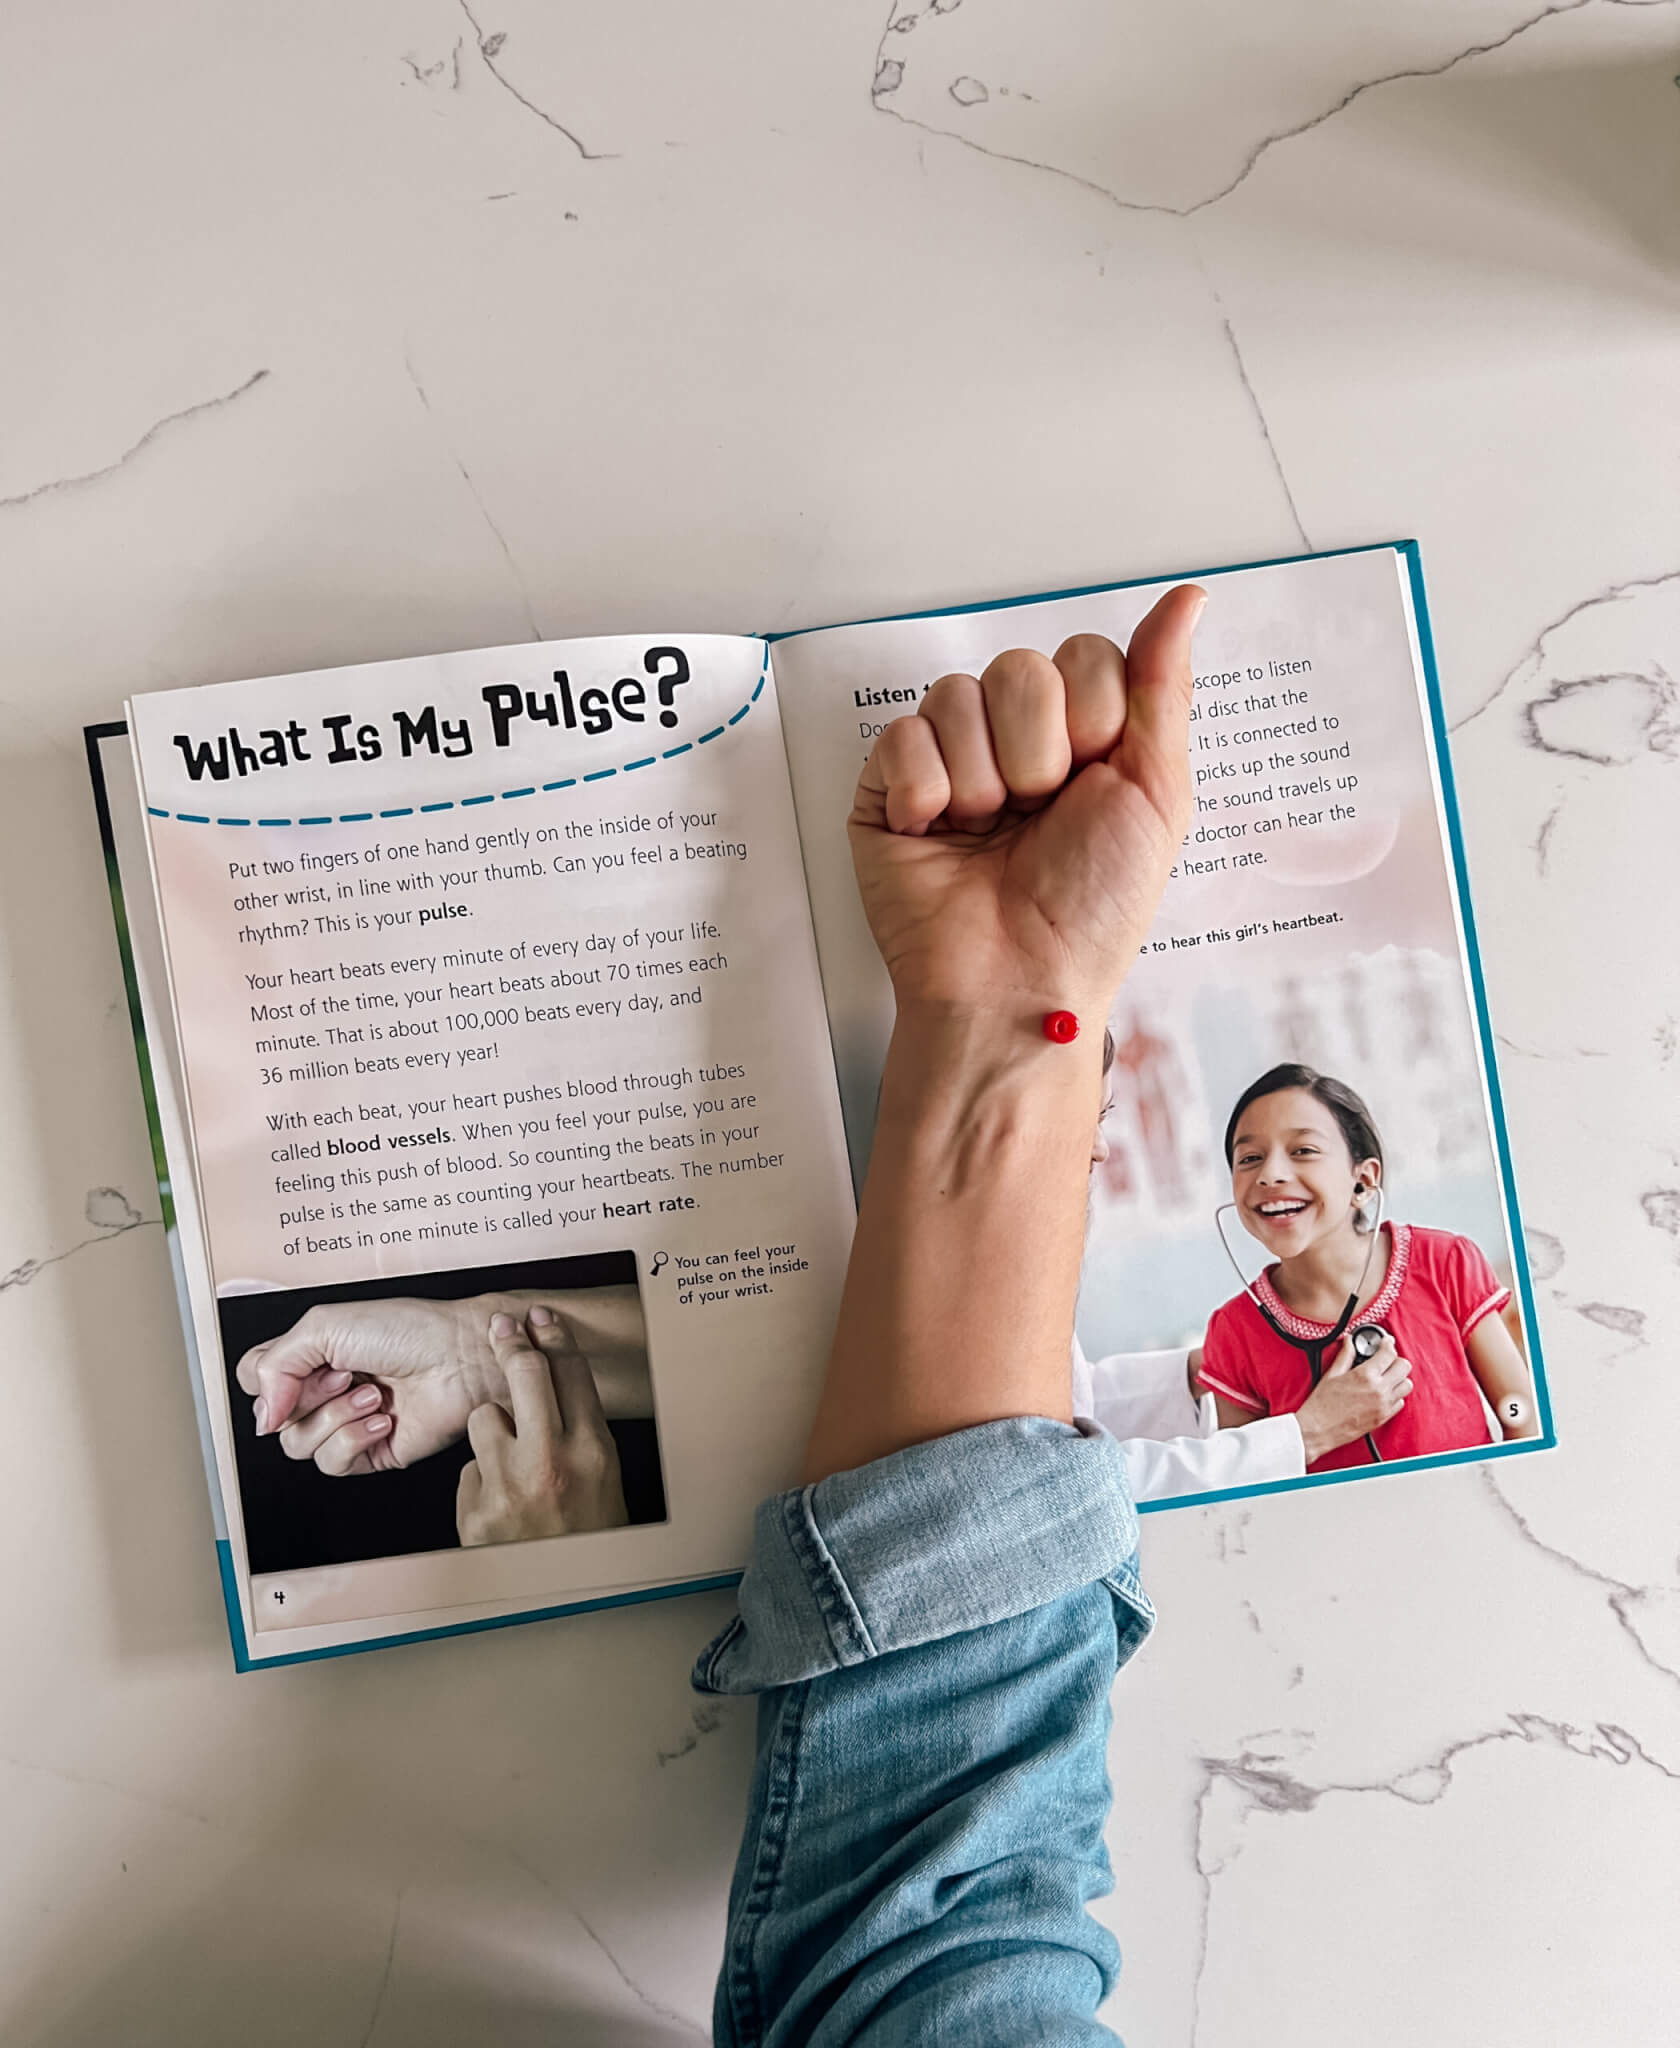
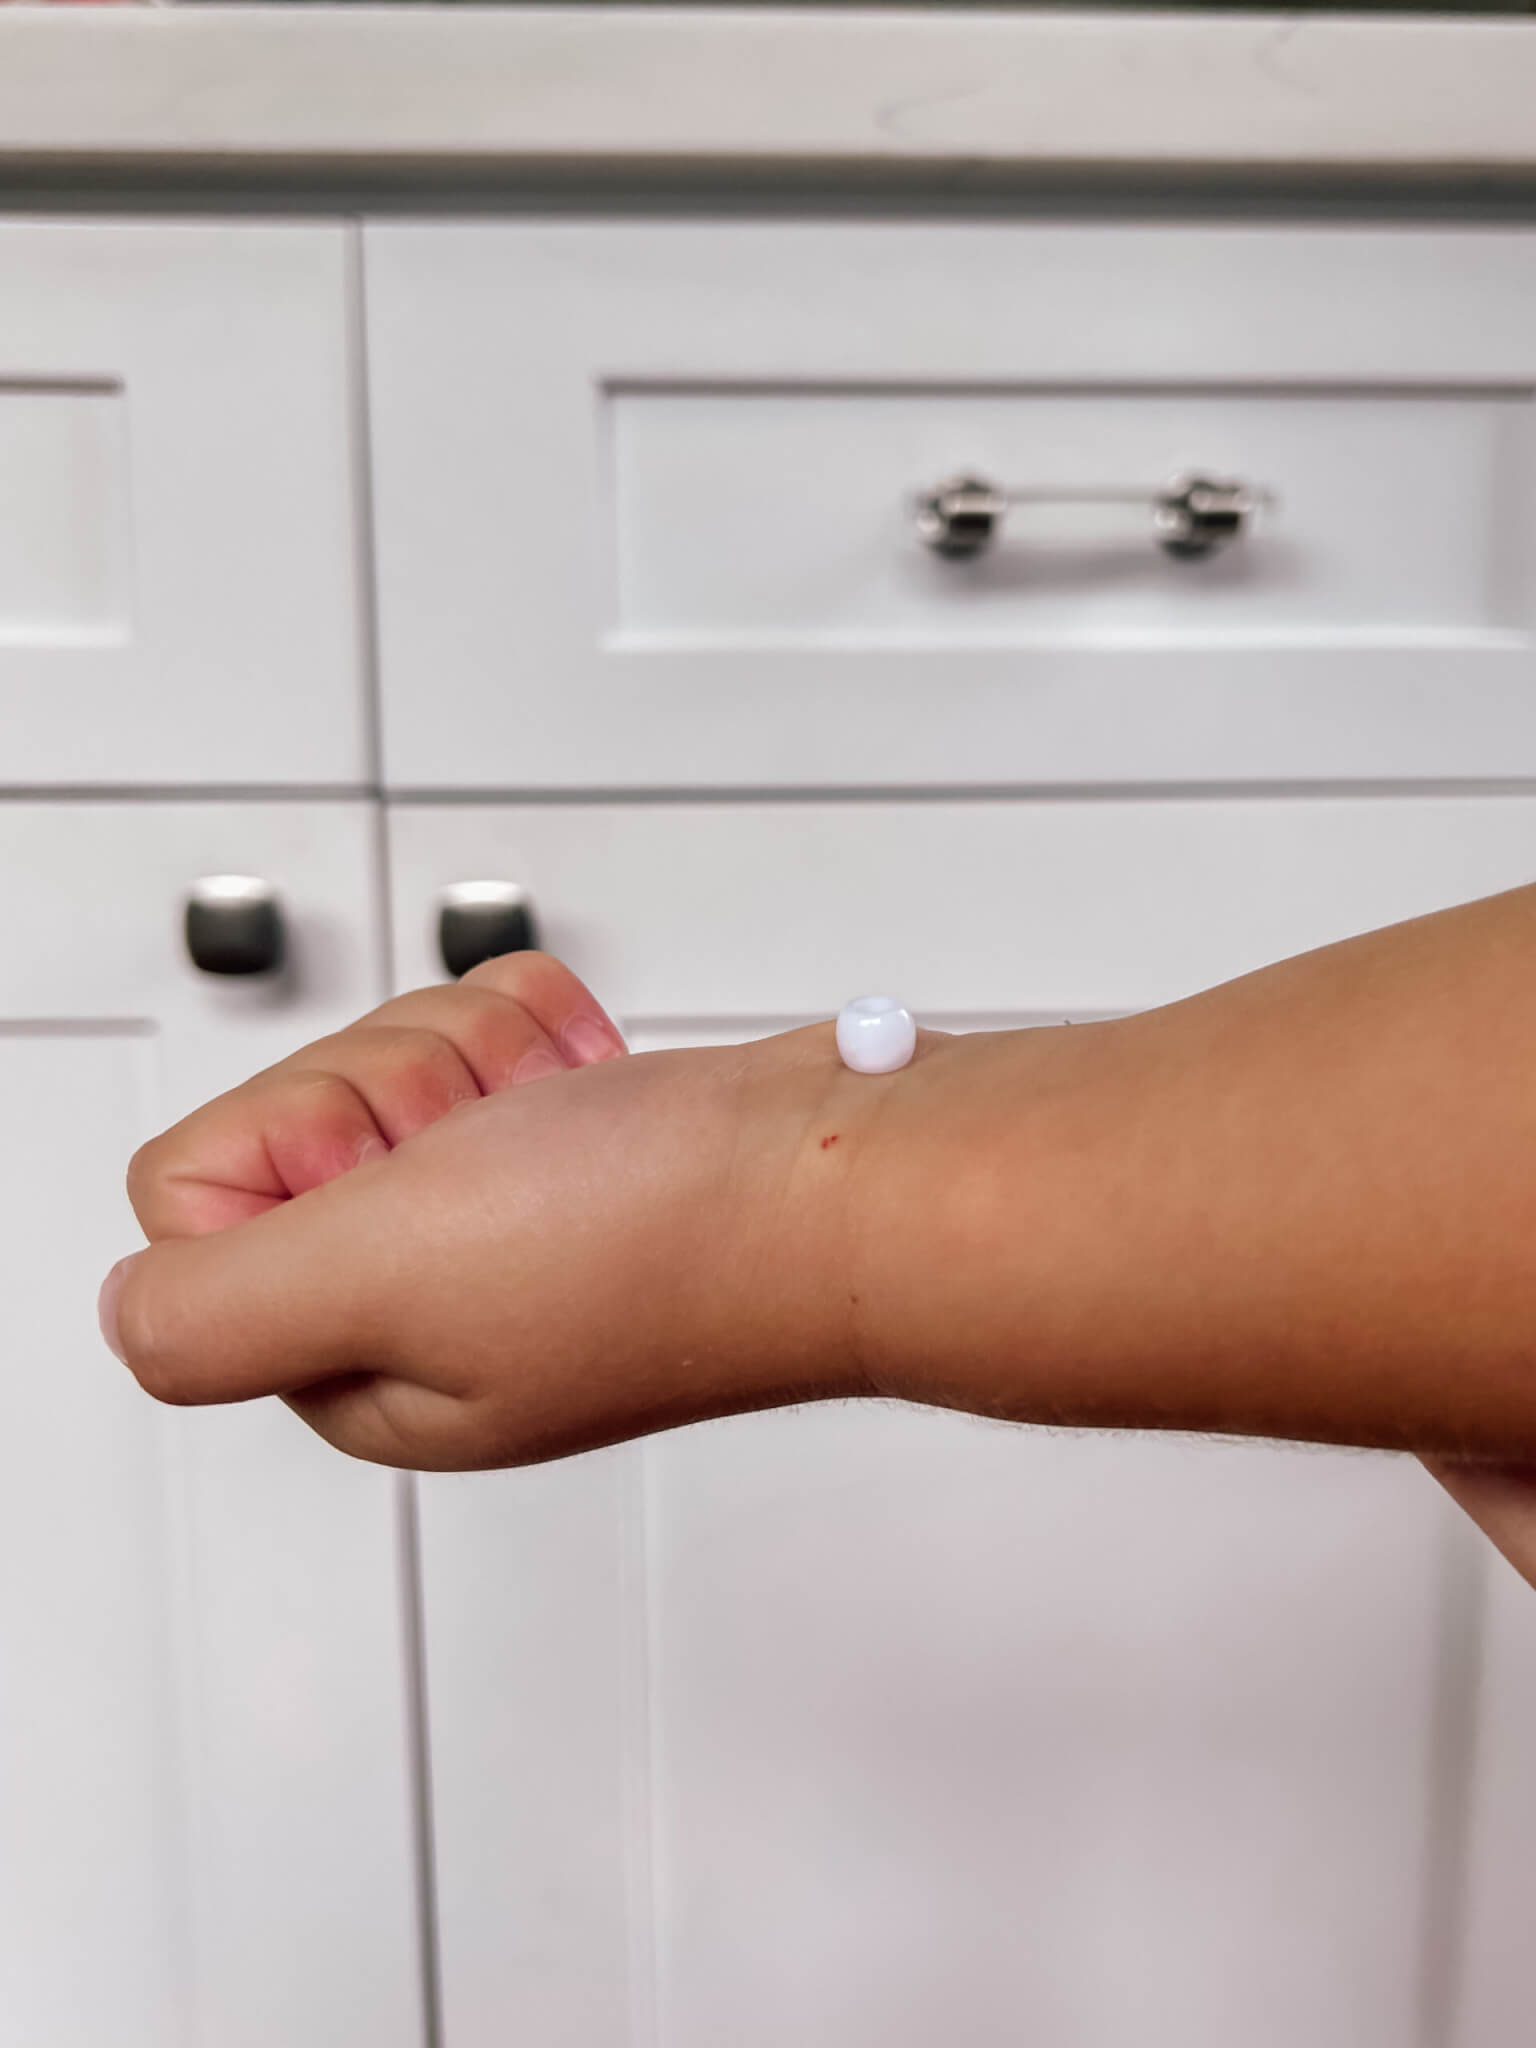
We transitioned to our discussion about the pulse by going back to the line of thought of the heart as a pump. And how that every time the heart squeezes or pushes blood out, that’s your heart beating. I mentioned that doctors can hear our heart beating with a tool called a stethoscope, which they were all fairly familiar with or had experienced before. Then, I asked if they knew that you could actually SEE your heart beating. That mostly got their attention. So, I proceeded to demonstrate. I used one of the leftover red beads from our blood model project and placed it on the pulse on my wrist. Everyone could see it moving, and I told them that was my heart beating and that another name for that is my pulse. My intention was to show each of them their own pulse as well. But I didn’t try out the small bead on tiny arms ahead of time, and they just couldn’t stay still enough for it to work. I did see somewhere where someone used a marshmallow with a toothpick in it (I guess to adjust it easily). This potentially could’ve worked better, but I still think it might’ve been difficult on small arms. I also briefly attempted to have them feel their own pulses. But I didn’t spend too much time there because it just didn’t feel like the right thing to devote energy to at that point. If I redo this at home with just my own kids soon-ish or when they’re older, I would definitely try to drive the point home a little more.After “seeing” our pulses, I had the kids stand up and move to our activity mat. We discussed physical activity and exercise as it relates to our heart beating and pulse. They (correctly) hypothesized that the heart beats faster when we are active. Then we tested out their hypothesis. We did 20 jumping jacks (mostly just jumping up and down), then took note of the fact that we felt we were breathing a little harder and faster. I don’t know if it hit home, but I tried to explain that when we move around more, our body has to do more work, and our heart has to beat faster to pump our blood through our body at the rate it needs to keep up with our activity. It was a good break and “get out the wiggles” moment if nothing else (though I do think they absorbed some).
Corresponding book: I pretty briefly referenced the book, “What is Your Pulse?” for this section because it just wasn’t the best use of time to go through more in our group setting. But I still wanted to mention this book here because, even though it’s old and possibly hard to find (we borrowed it from our library), it has a lot of good information broken down into appropriate questions on each pair of pages.
THE CIRCULATORY SYSTEM
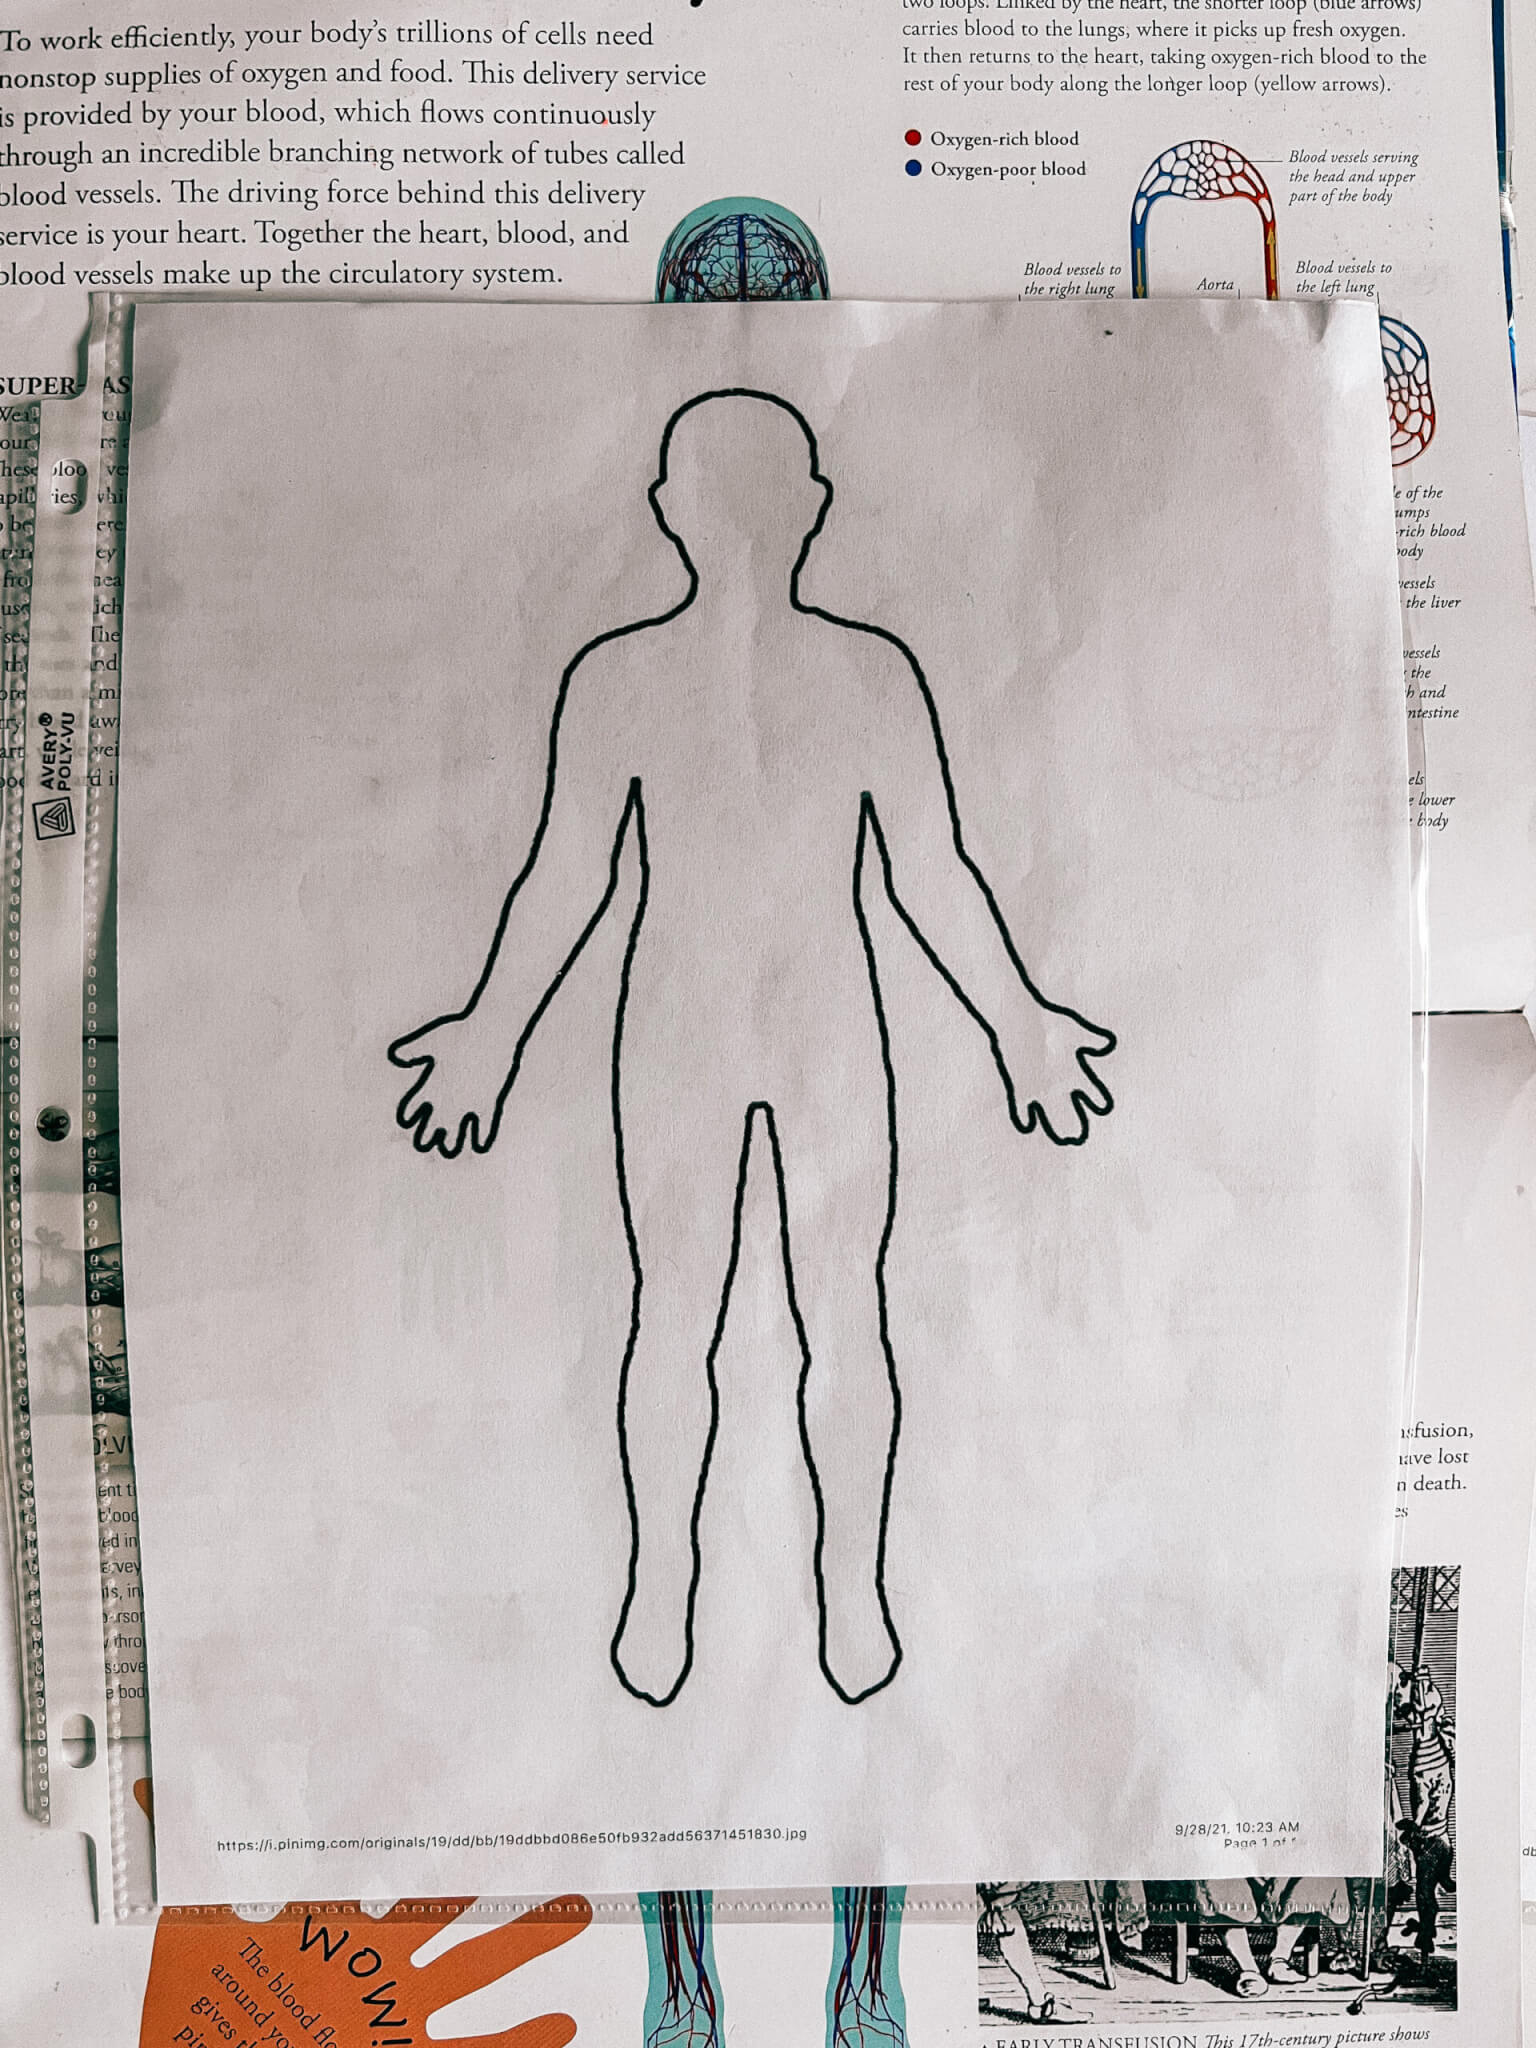
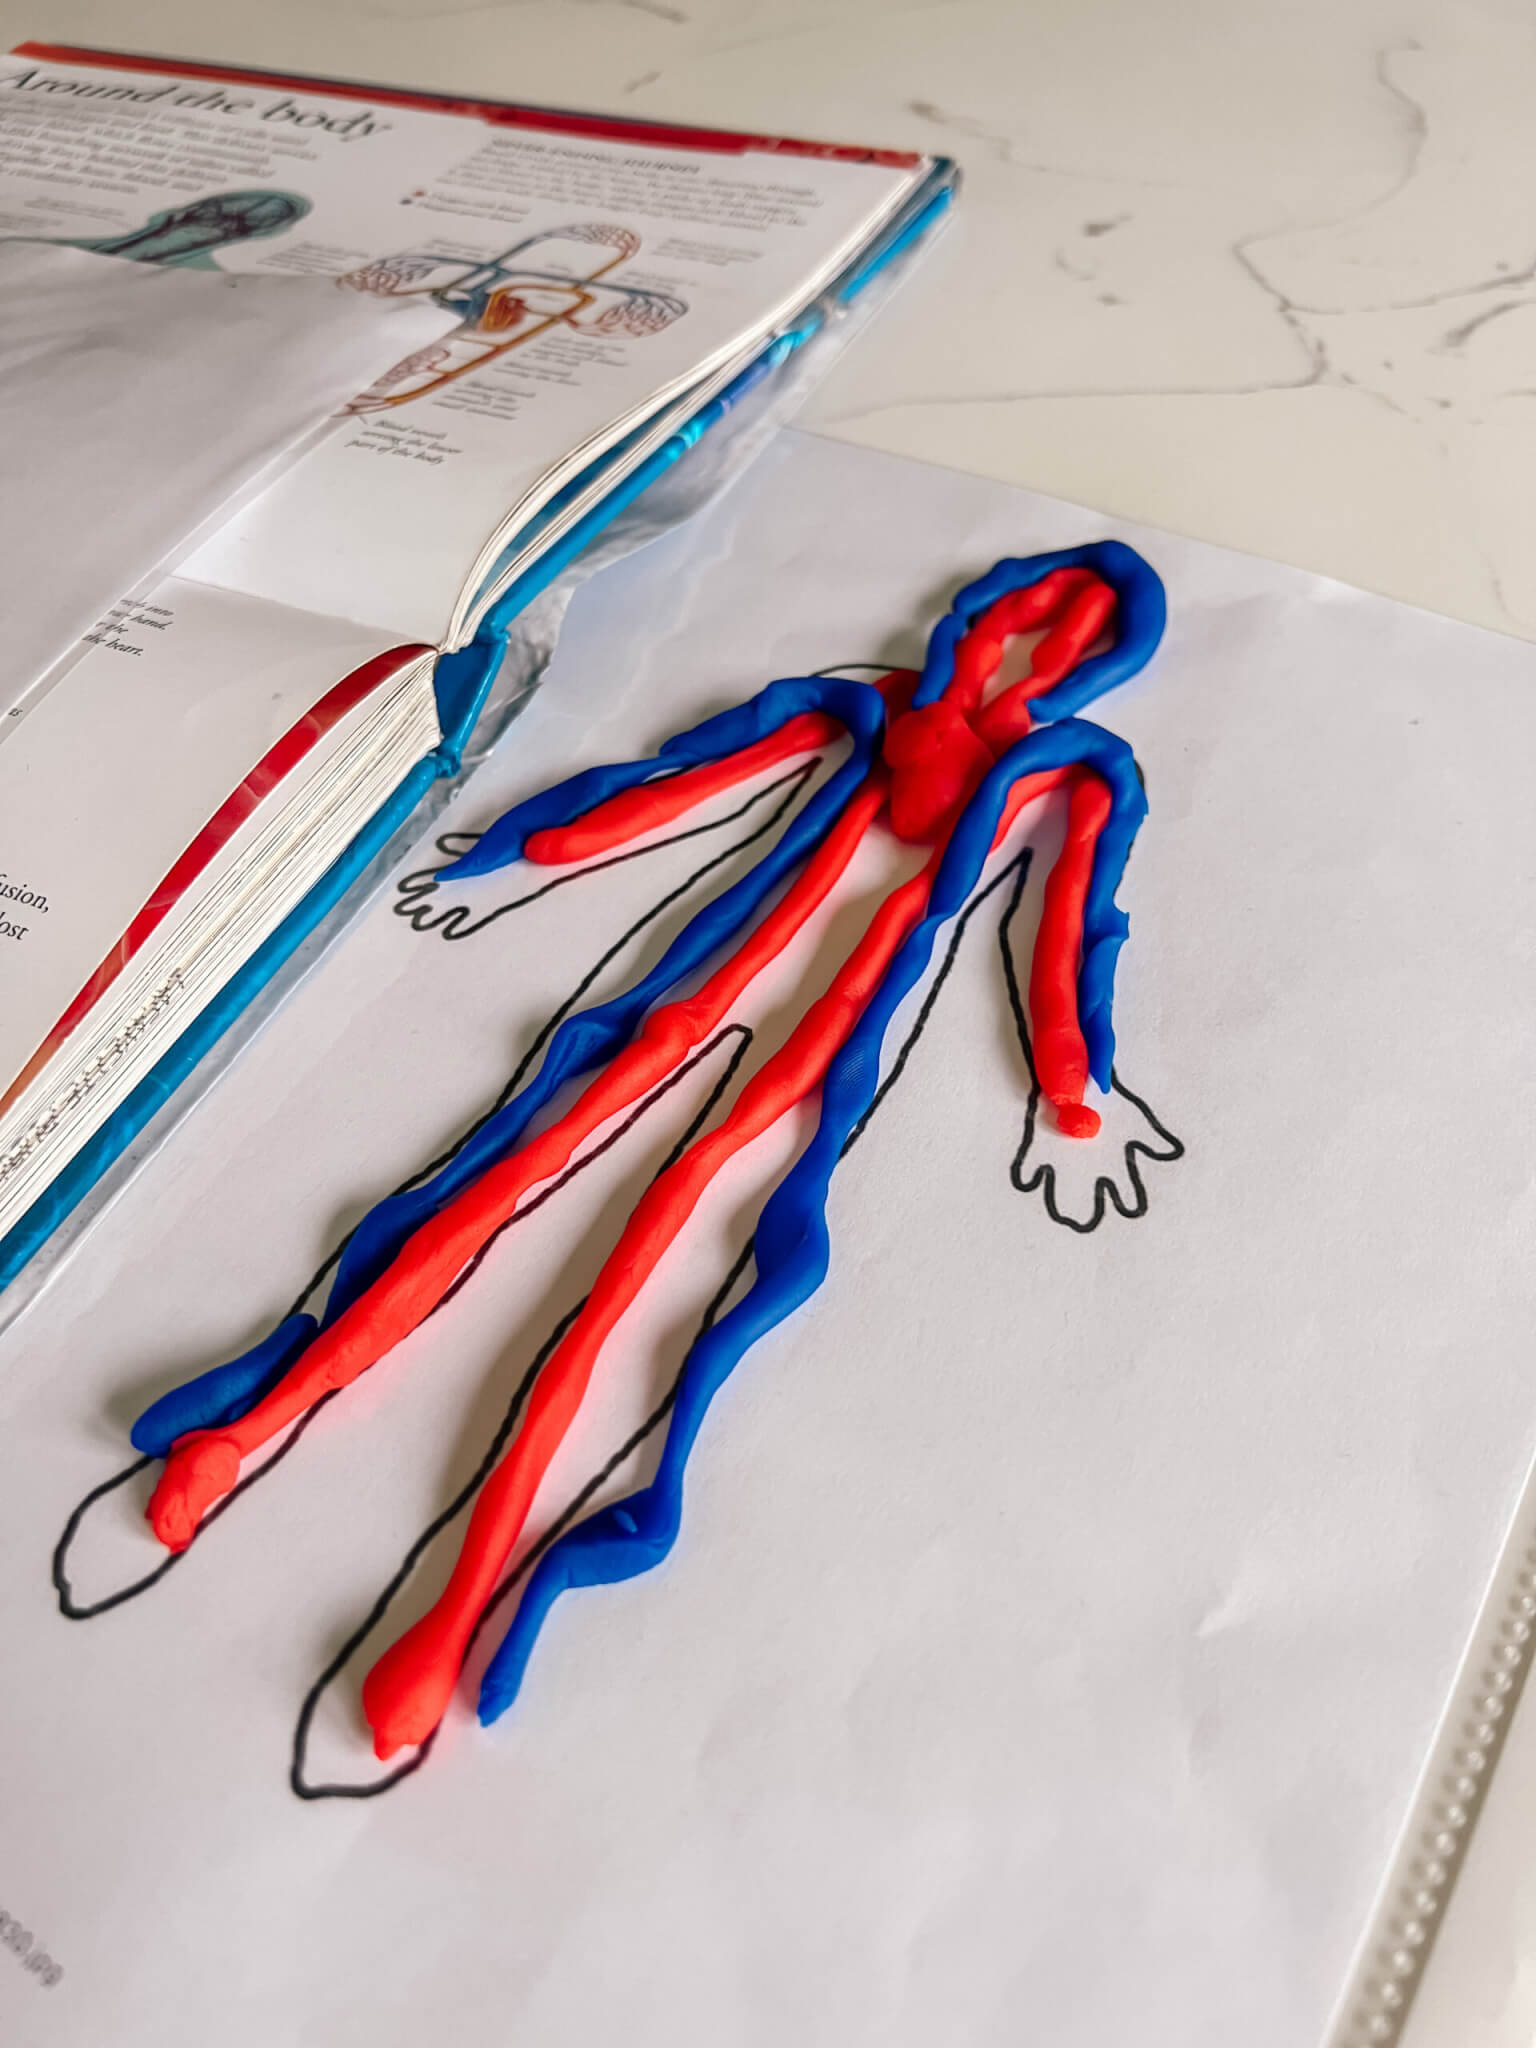
To wrap up our little study of the heart and circulatory system, I wanted to give the kids an idea of how expansive the circulatory system is. I chose to keep it simple, knowing that the last topic and corresponding activity would need to grab their attention to help them stay the course until snack time. I reiterated how the heart is a hardworking muscle that pumps blood through the WHOLE body—our head and neck, chest, stomach, legs, and feet. Then, I pulled out a visual from the book, “Human Body: A Visual Encyclopedia.” I quickly explained that all the red and blue lines in the picture were blood vessels and that they were like little tunnels that the blood traveled through… The blue are called veins, and the red are called arteries. I left it at that, then passed out human body outlines in sheet protectors and gave each child a small amount of both red and blue play dough. I told them they could look at the picture and make their own circulatory system. I also demonstrated quickly how to do it, making sure to emphasize that there are veins and arteries in every part of our body. I thought this was going to be a quick thing, but it turned out to be their favorite, I think. They each took time rolling out small strands of play dough and carefully placing it on their human outline. It was a good ending to our teaching part of the day.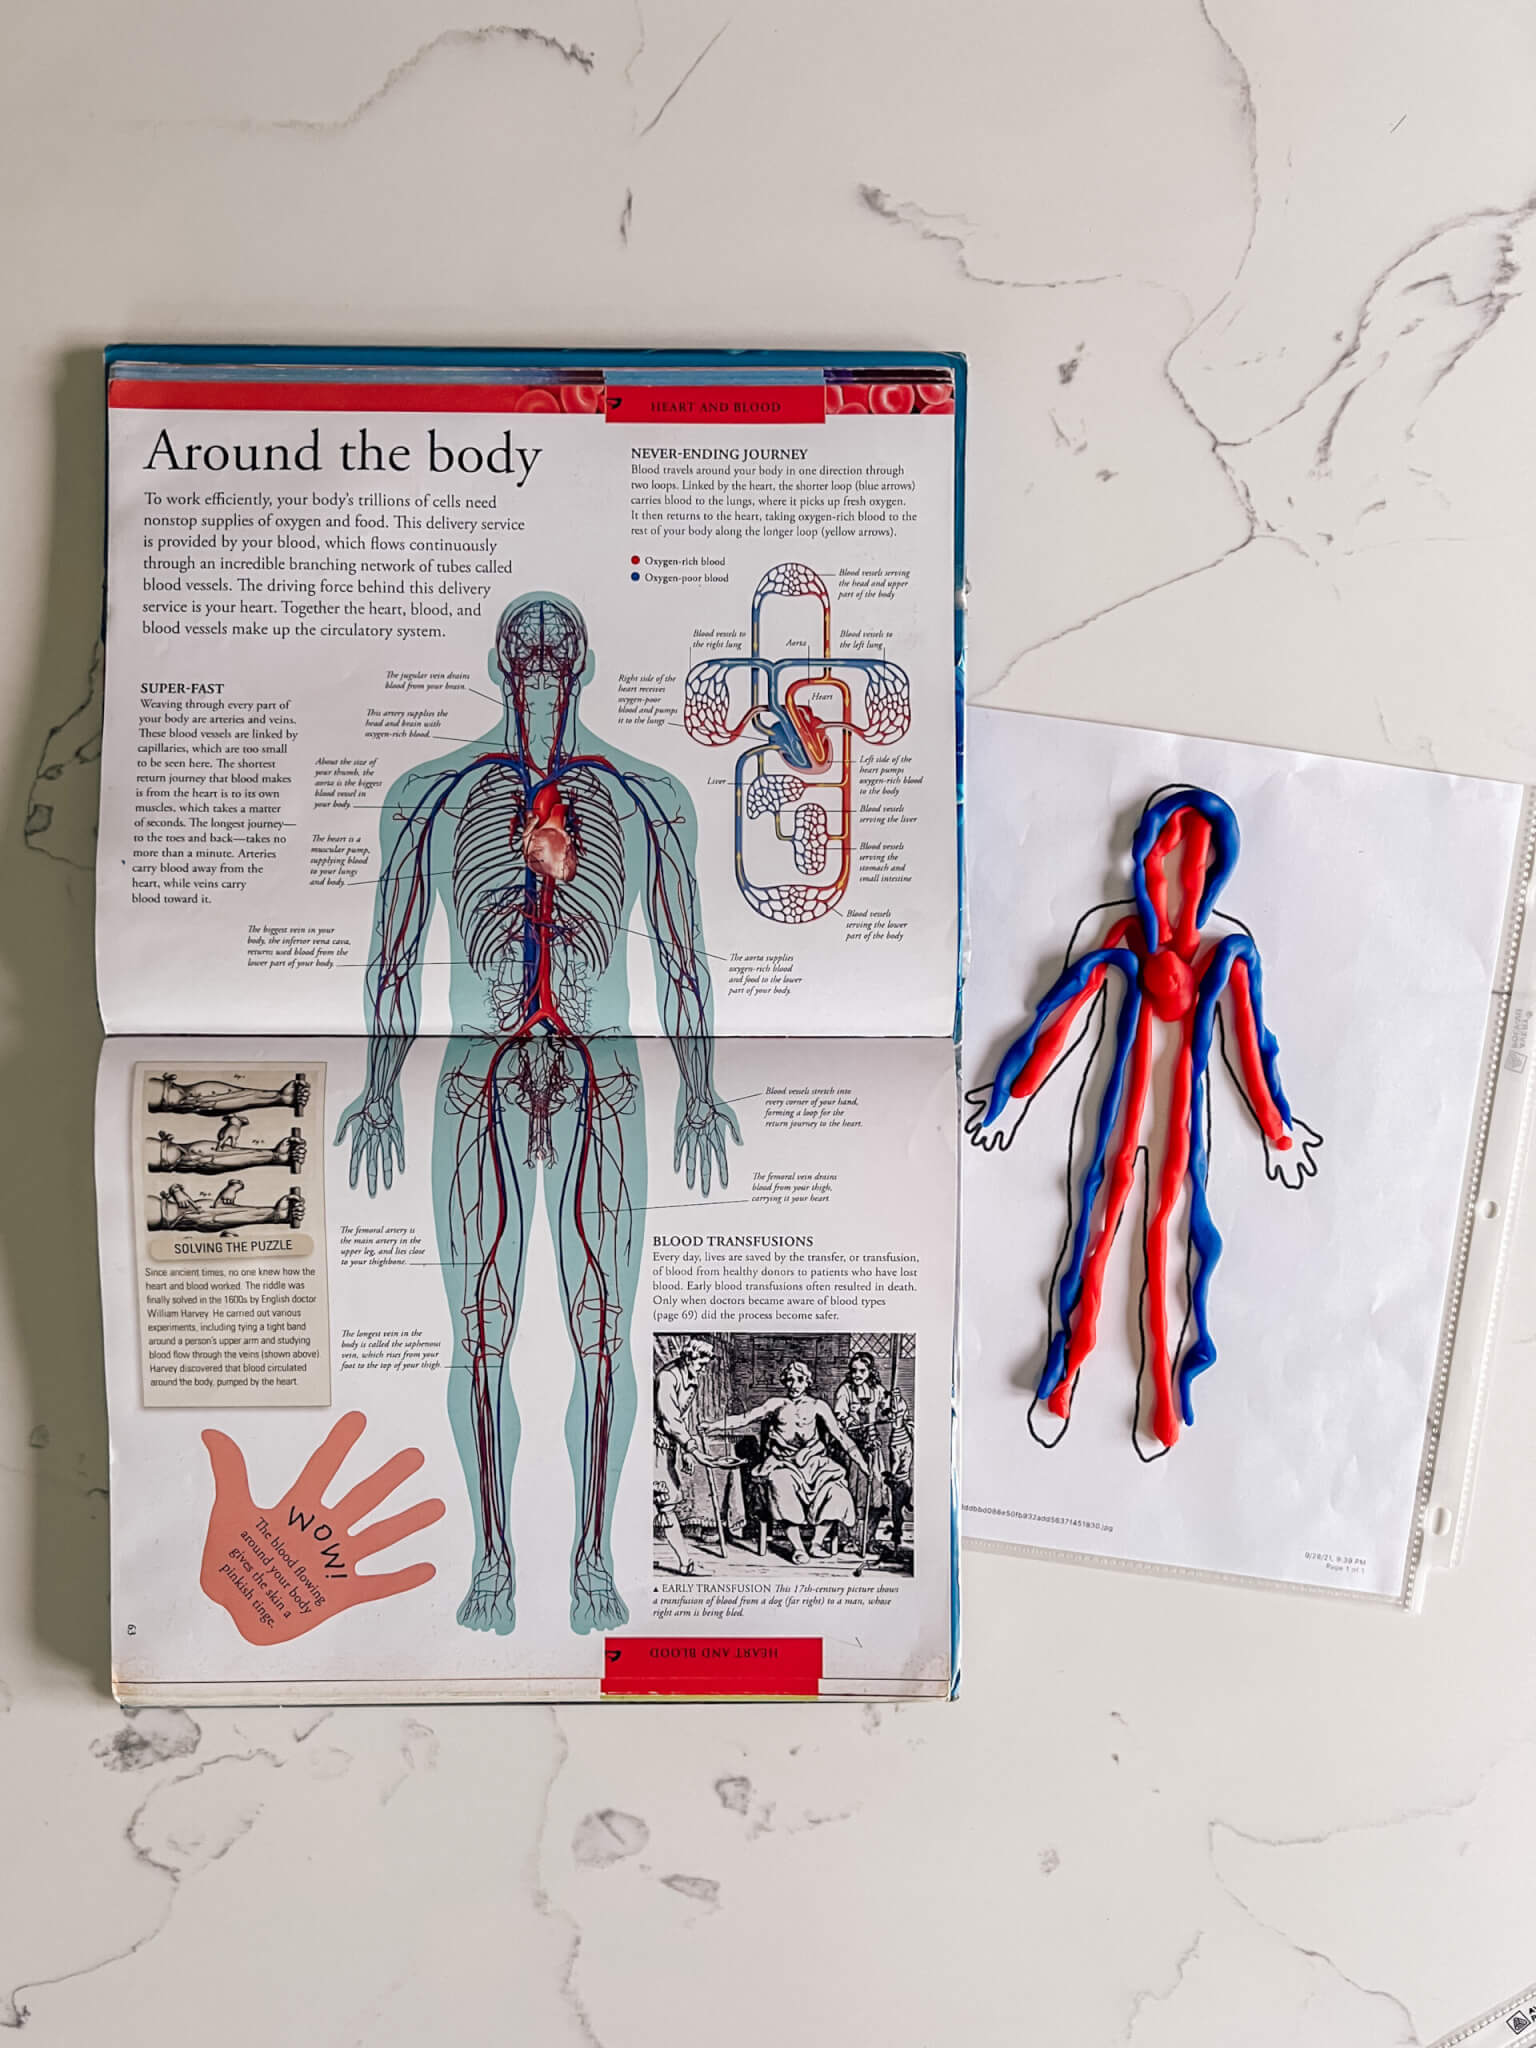
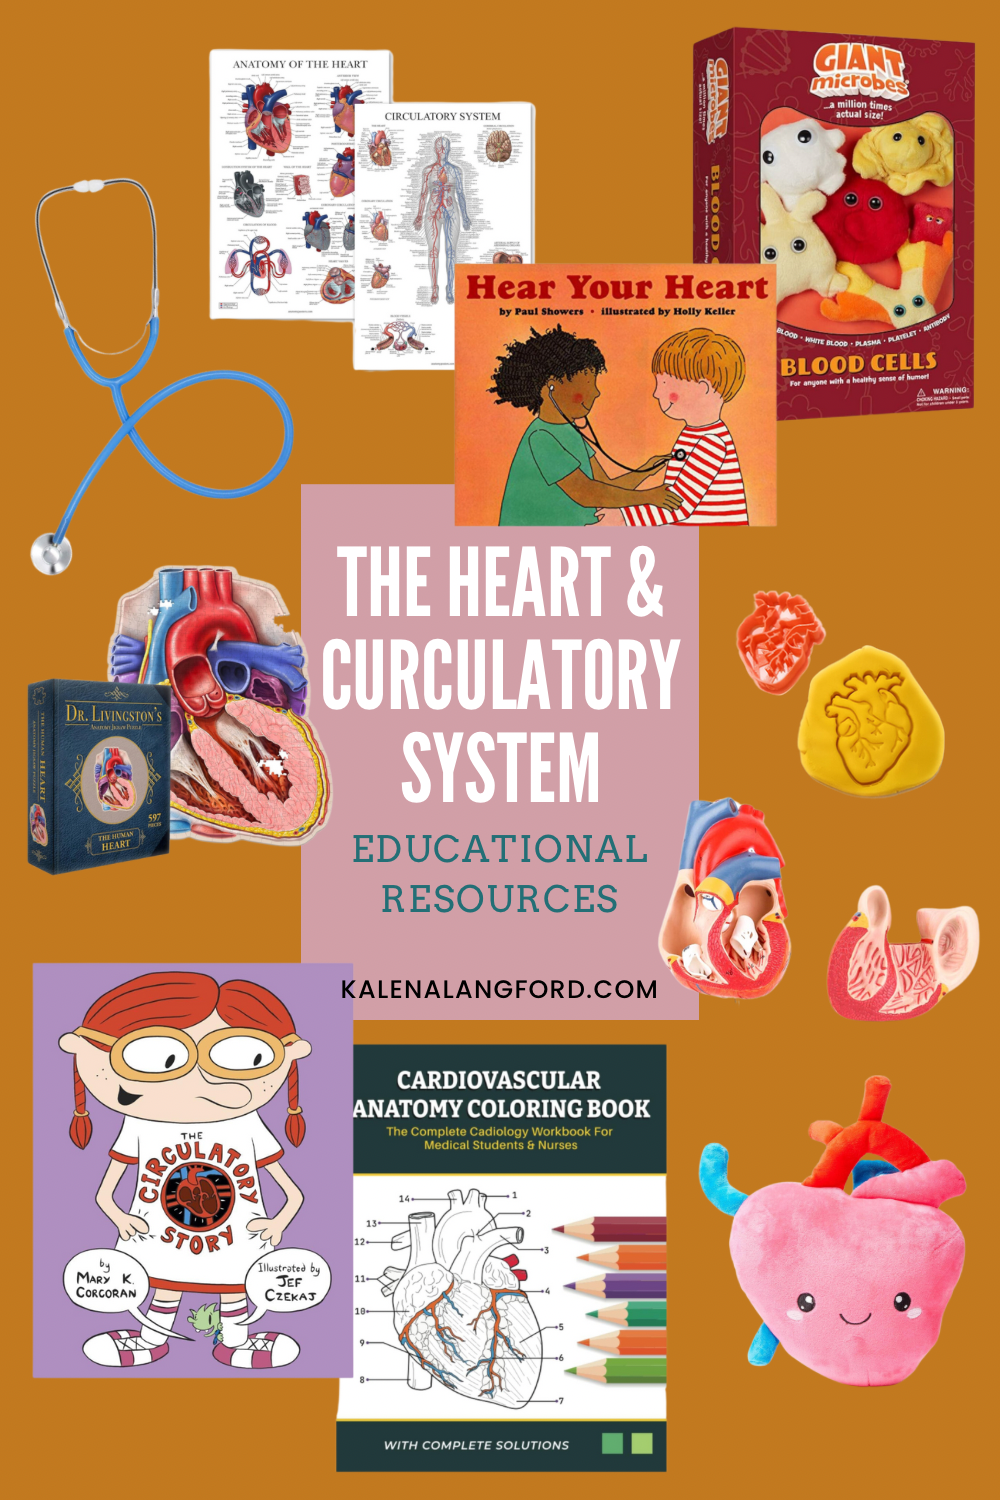
Well, now having written all that out, you can confirm that I get wordy. I hope that if you got this far, it’s been a help, though. You can also checkout my Amazon list (photo of some things below) with educational resources for learning about the heart and circulatory system as well as my Homeschooling Pinterest board (with a section for the same).
If you happen to use any of this or just want to show me some of your homeschool resources and lessons, I’d love for you to tag me on Instagram—@thelangfordhouse. I’m hoping and working on sharing more of our homeschool journey here and there.